HTML appointment booking widget to embed on your website using JavaScript. The DaySchedule appointment slot picker is designed to display available time slots on your HTML website.
HTML is a free and open standard for creating web pages and user interfaces for browsers. All of the front frameworks like React, Angular, Next.js etc. render the HTML.
If you have your website built on simple HTML or other front end technology like React, you can embed the DaySchedule widget to integrate a full featured appointment scheduling widget for online appointments.
In this article, I will show you how to use our open-source JavaScript widget to embed the calendar in HTML website, and bonus point is I will be using Bootstrap for template styling for a responsive booking button auto adjustable on mobile devices using sm, lg classes.
The full code examples are available on our Github repository.
Setup your website template
<!DOCTYPE html>
<html lang="en">
<head>
<title>Home</title>
<meta charset="UTF-8" />
<meta name="viewport" content="width=device-width" />
<script src="/script.js" type="text/javascript"></script>
<!--Bootstrap library -->
<link
href="https://cdn.jsdelivr.net/npm/bootstrap@5.2.3/dist/css/bootstrap.min.css"
rel="stylesheet"
integrity="sha384-rbsA2VBKQhggwzxH7pPCaAqO46MgnOM80zW1RWuH61DGLwZJEdK2Kadq2F9CUG65"
crossorigin="anonymous"
/>
<script
src="https://cdn.jsdelivr.net/npm/bootstrap@5.2.3/dist/js/bootstrap.bundle.min.js"
integrity="sha384-kenU1KFdBIe4zVF0s0G1M5b4hcpxyD9F7jL+jjXkk+Q2h455rYXK/7HAuoJl+0I4"
crossorigin="anonymous"
></script>
<!--Dayschedule widget library from https://dayschedule.com/widget -->
<script
src="https://cdn.jsdelivr.net/npm/dayschedule-widget@latest/dist/dayschedule-widget.min.js"
defer
></script>
</head>
<body>
<header>
<nav class="navbar navbar-dark bg-dark">
<div class="container">
<a class="navbar-brand" href="#"> Your Logo </a>
</div>
</nav>
</header>
<div class="container px-3 my-5">D
<main>
<div class="row">
<div class="col-md-6 my-auto">
<h1 class="display-4">Your hospital name</h1>
<p class="lead">
Click on the <strong>book appointment</strong> button to try this
out. You can customize the color, calendar availability etc by
passing the options on widget
<a href="https://dayschedule.com/widget">
See documentation →
</a>
</p>
</div>
<div class="col-md-6">
<img
src="https://s3.amazonaws.com/us-east-1.data.dayschedule.com/uploads/org-47/Pages/107-1643352013326-Doctor%20Instagram%20Post%20(824%20%C3%97%20552%20px).png"
class="img-fluid"
/>
</div>
</div>
<div class="row mt-4 mb-4">
<div class="col-md-6 my-3">
<div class="card">
<div class="card-header">Orthopedic</div>
<div class="card-body">
<h5 class="card-title">Dr Tawang</h5>
<p class="card-text">
With supporting text below as a natural lead-in to additional
content.
</p>
<button
class="btn btn-primary"
onclick="openDaySchedule('https://vikash.dayschedule.com/')"
>
Book appointment
</button>
</div>
</div>
</div>
<div class="col-md-6 my-3">
<div class="card">
<div class="card-header">Dentist</div>
<div class="card-body">
<h5 class="card-title">Dr John Doe</h5>
<p class="card-text">
With supporting text below as a natural lead-in to additional
content.
</p>
<button
class="btn btn-primary"
onclick="openDaySchedule('https://meet.dayschedule.com/')"
>
Book appointment
</button>
</div>
</div>
</div>
</div>
</main>
</div>
<footer class="page-footer font-small pt-4 px-4">
<!-- Footer Text -->
<div class="container d-flex justify-content-center">
<p>Footer content, © 2020 Copyright etc...</p>
</div>
<!-- Footer Text -->
</footer>
</body>
</html>
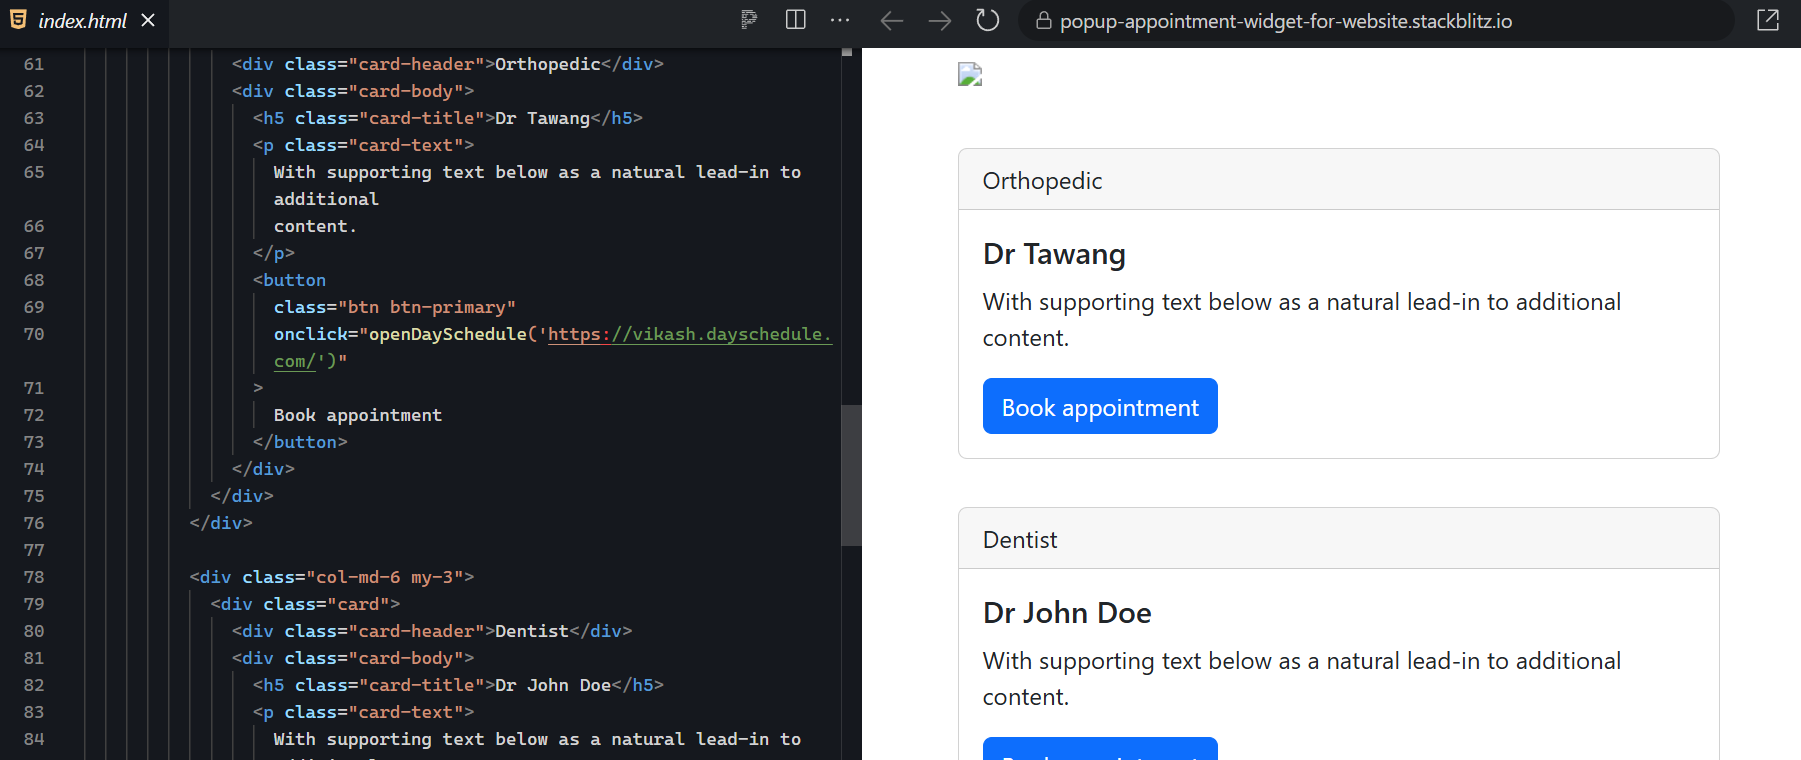
I am using a doctor website HTML template with 2 doctors names for appointment and the responsive design using Bootstrap.
This templates includes two Bootstrap cards, each representing a doctor with a “Book Appointment” button to open the DaySchedule appointment widget popup.
The “Book appointment” buttons in the main section use onclick events to invoke the below JavaScript function in /script.js to open the DaySchedule widget.
function openDaySchedule(url) {
  daySchedule.initPopupWidget({
    url: url,
    color: {
      primary: '#232325',
      secondary: '#adadad',
    },
  });
}
Usage
Now, we’ve set up the DaySchedule widget in our HTML application. Follow these steps to use it on your page:
- Include the DaySchedule widget library from in your HTML website header. You can download on your project or use it from the CDN .
<script src="https://cdn.jsdelivr.net/npm/dayschedule-widget@latest/dist/dayschedule-widget.min.js" defer></script>
- Add a button to trigger the DaySchedule popup where you want it to appear on your page:
<button
  class="btn btn-primary"
  onclick="openDaySchedule('https://your-schedule-link.dayschedule.com')"
>
  Book an Appointment
</button>
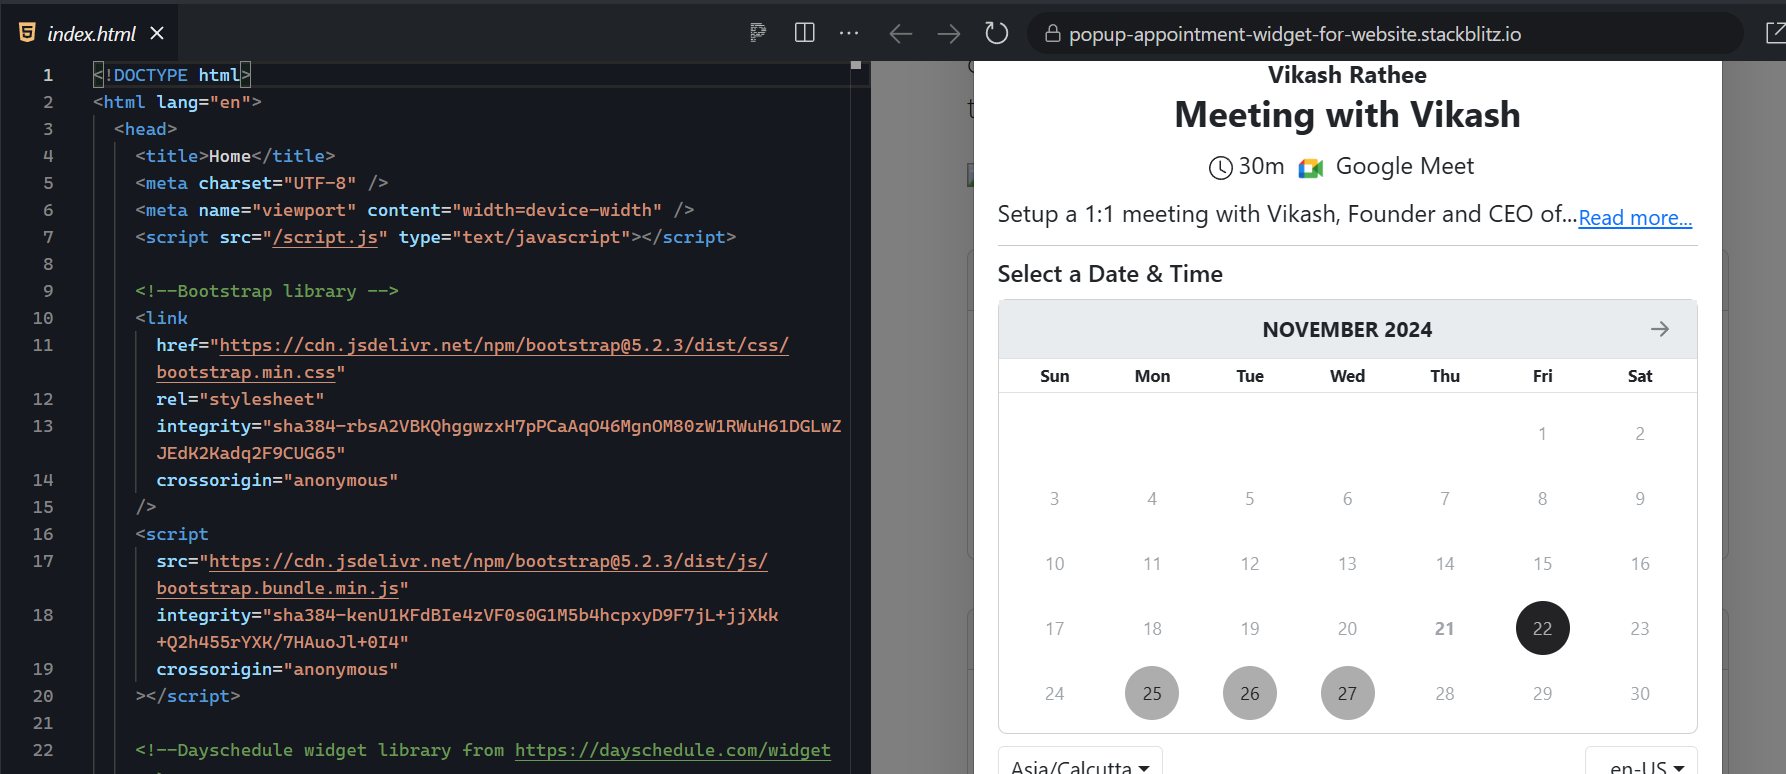
Preview
When a user clicks on the Book Appointment button next to a doctor’s name, a modal will open, allowing the user to select a date and time for the appointment.
After selecting date and time, the user will be asked to enter their name, email, and phone number to confirm and complete the booking process.
This process can be easily customized into any website using the appointment widget for HTML and JavaScript.
For developers looking to add this feature to their website, there are ready made template and examples available on Github repository, allowing for quick deployment and customization.
The free booking widget for websites can be a great solution for businesses or healthcare professionals looking to add scheduling experience for their clients or patients.
Full code
Check out the complete example code for easy implementation and testing.