Creating an appointment booking website on DaySchedule is a straightforward process that can help you to manage your online appointments. Here’s a step-by-step guide to setting up your own appointment booking website in 6 steps.
Steps -
- Create your DaySchedule account
- Create a appointment page
- Setup your availability
- Create an appointment type
- Customize your booking page
- Manage appointments
Create your DaySchedule account
First, you’ll need to have a DaySchedule account. If you don’t have one yet, head over to DaySchedule website or mobile app and sign up to create your account.
If you already have an account, simply log in and go to step 2
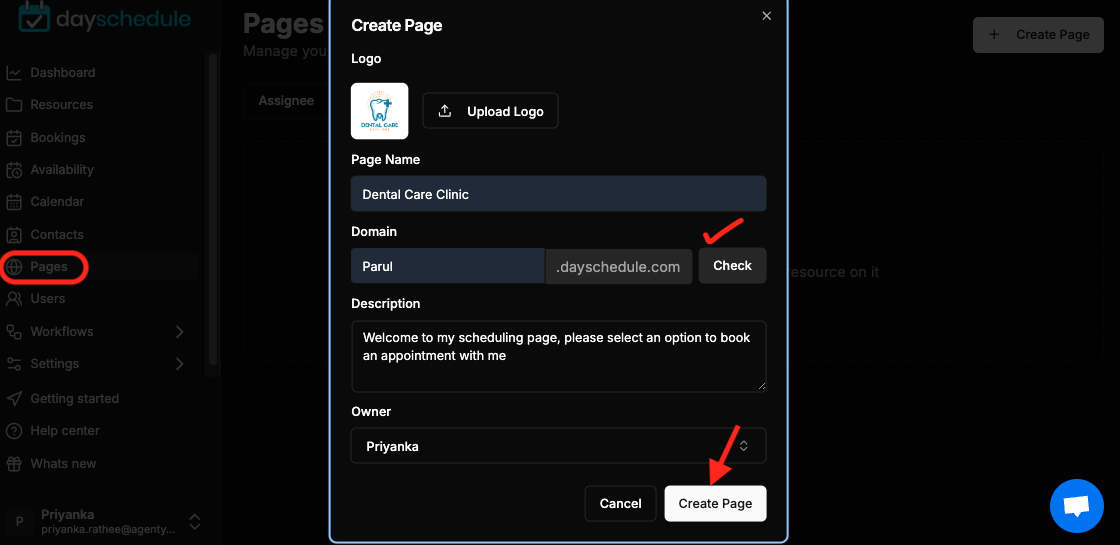
Create an appointment page
- Go to Pages
- Enter your name or business name
- Check the domain availability and confirm to create your free appointment page.
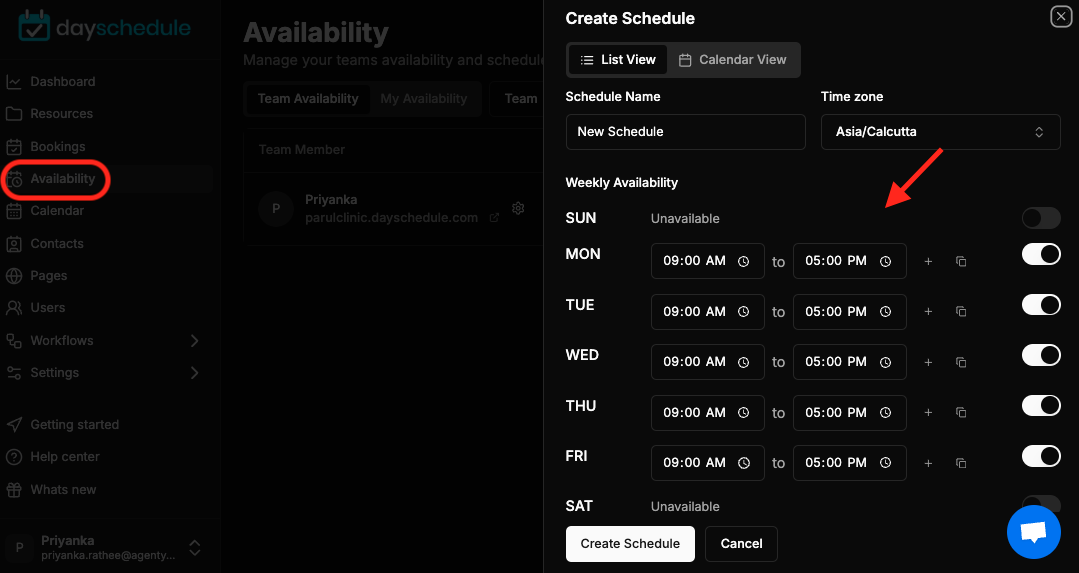
Setup your availability
Go to settings > availability to define weekly schedule and days when you are available for appointments.
You can also set specific time slots and daily limit to avoid too many bookings in a day.
- Choose week days Select the days of the week you want to offer appointments to your clients.
- Set time slots: Define specific time slots when clients can book appointments.
Create an appointment type
DaySchedule allows you to create different types of appointments, such as 1:1 consultations, group booking for yoga, classes etc. or round robin event for sales, support teams to auto assign booking to next free member.
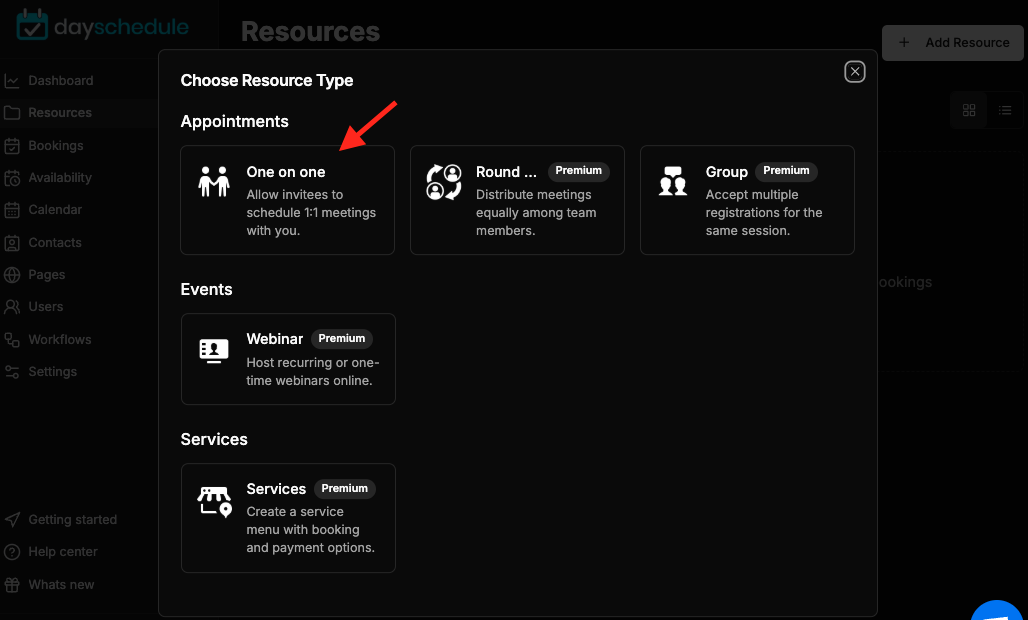
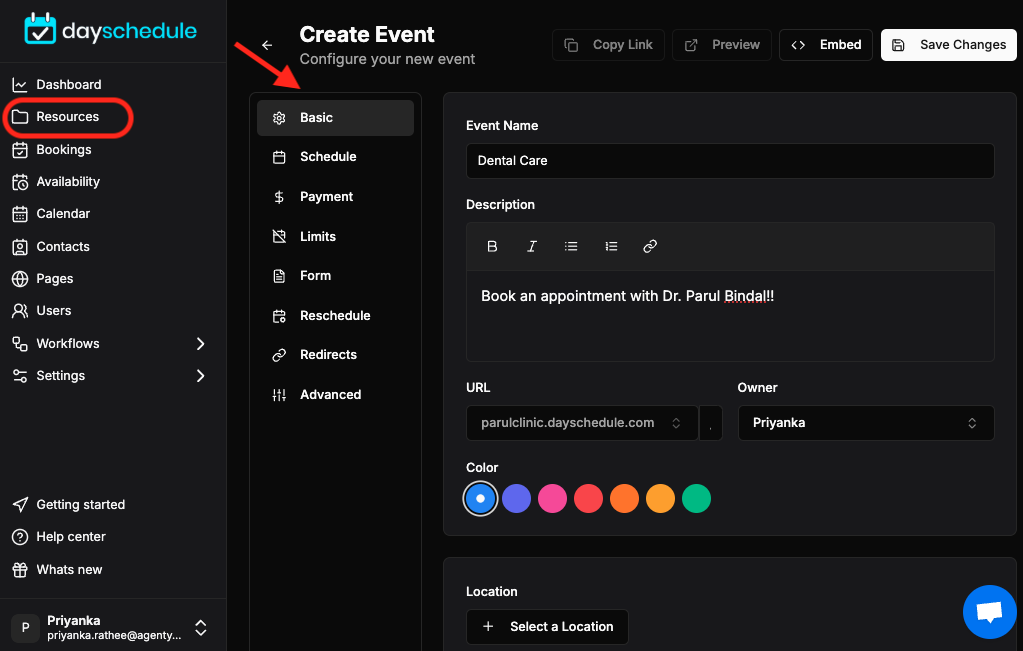
- Go to Resources
- Click on “Add Resource” button
- Select the type of appointment and complete the form.
-
Name your appointment type: Give your appointment a name that clients will understand.
-
Set duration: Specify the length of the appointment.
-
Add description: Provide a brief description of what the appointment entails.
-
Set pricing (optional): If you charge for appointments, you can connect with Razorpay or Stripe and set the pricing here.
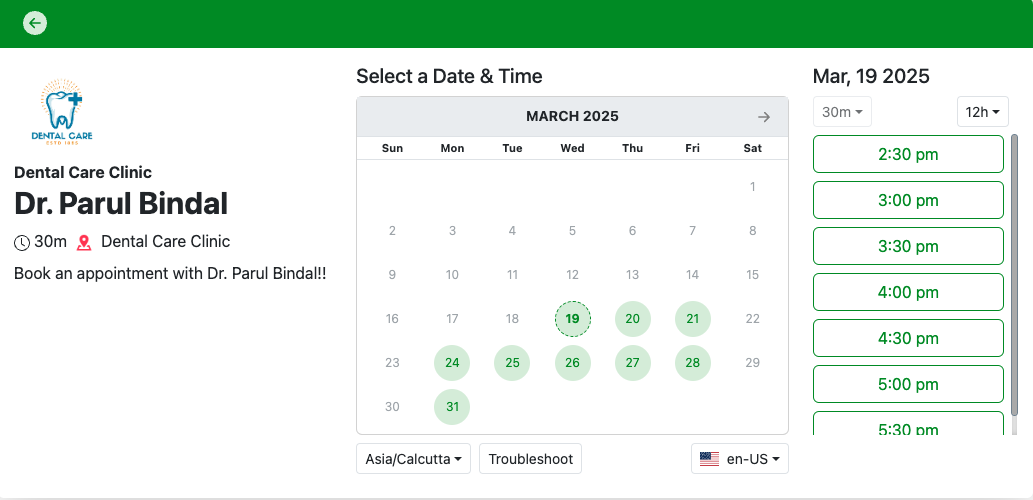
-
And your appointment page is ready:
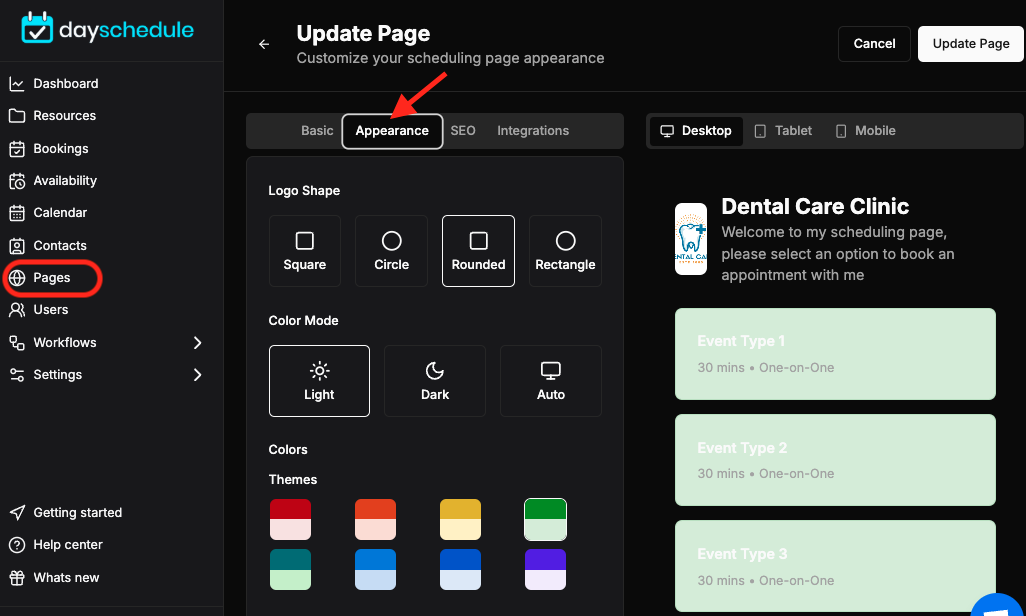
Customize your booking page
DaySchedule lets you customize your booking page to match your brand. You can add your logo, change colors, and adjust the layout to fit your needs.
- Go to Pages
- Edit your appointment page
Here you can :
- Add branding: Upload your logo and choose colors that represent your brand.
- Customize text: Modify any text on the booking page to make it more personalized.
You can also use the workflow to set up appointment email notification or text reminder to remind clients of their appointments.
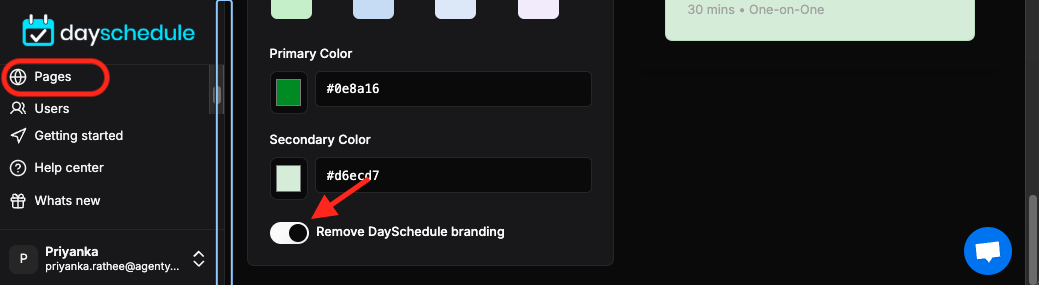
You can remove the DaySchedule logo from appointment webpage :
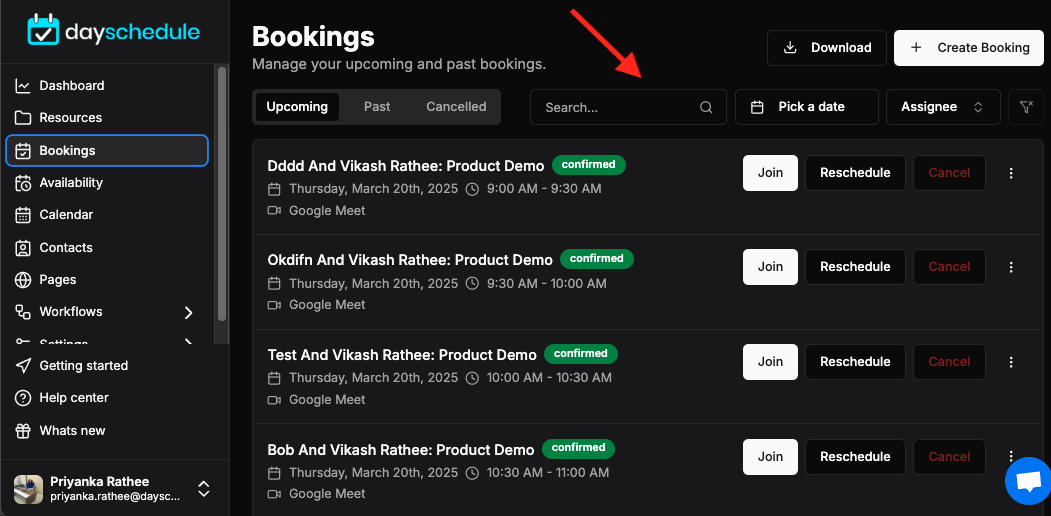
Manage appointments
As clients start booking appointments, you can manage all bookings directly on DaySchedule online appointment booking system. You can view upcoming appointments, reschedule if necessary, and even communicate with clients through the system.
- View bookings: Check your bookings page for all upcoming appointments.
- Reschedule, cancel and no shows: Easily reschedule or cancel appointments if needed.
- Client communication: Send messages or reminders to clients using pre-defined templates.