In this article, we will see how to integrate DaySchedule with Stripe to collect payment from your invitees while booking an appointment with you.
The Stripe payment integration for small businesses makes it easy to accept payments from their customers on scheduling page. These highly desirable features include built-in protection against fraud and identity theft, as well as the ability to accept multiple payment cards from customers at the same time.
Businesses can connect their Stripe account with DaySchedule to accept international payment on bookings from multiple sources – such as UPI, Facebook payment, and Google Wallet and more.
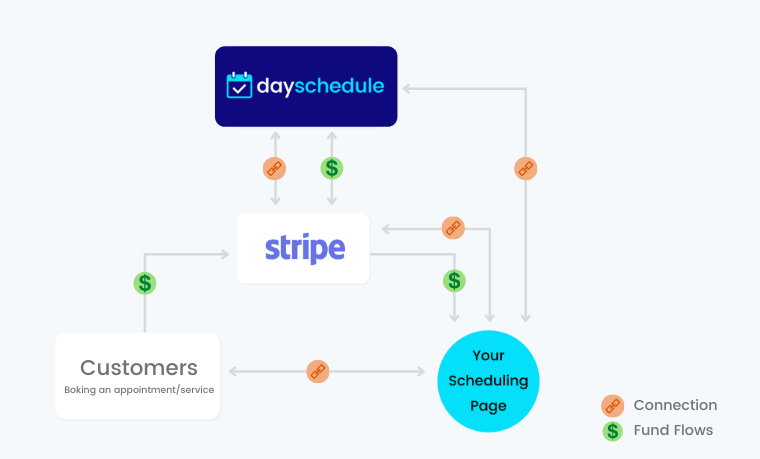
For example, a customer can book an online appointment with Doctor in UK and pay through Stripe for their consulting session on Zoom.
Connect to Stripe
- Login your DaySchedule account > setting > connections page.
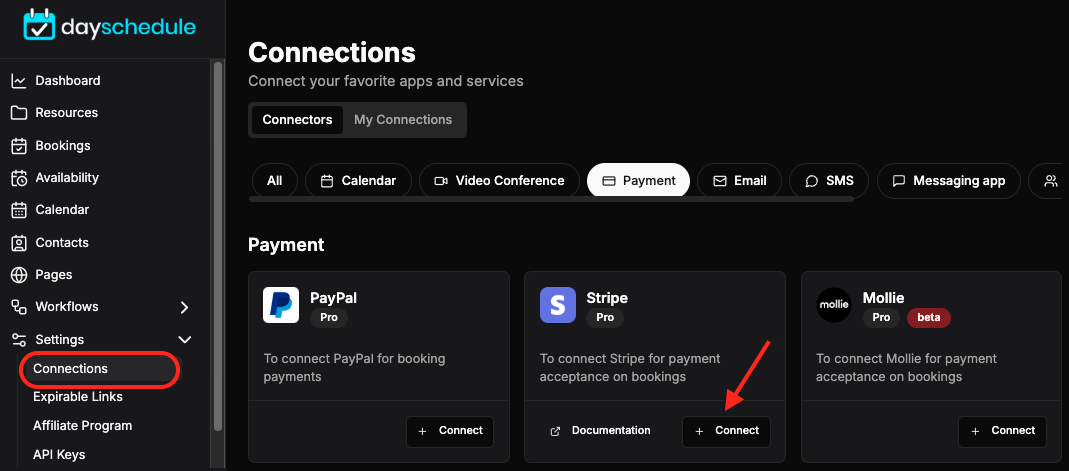
- Click on the Connect button to initiate the connection.
- You will be redirected to the Stripe website to authorize and select an account.

Add Stripe Payment Gateway on Event Page
After connected stripe integration with DaySchedule, just add it on your event:
- Go to the resources > select an event
- Edit this event by clicking on three-dots
- Just go to the payment page > enable payment option > select payment gateway from dropdown
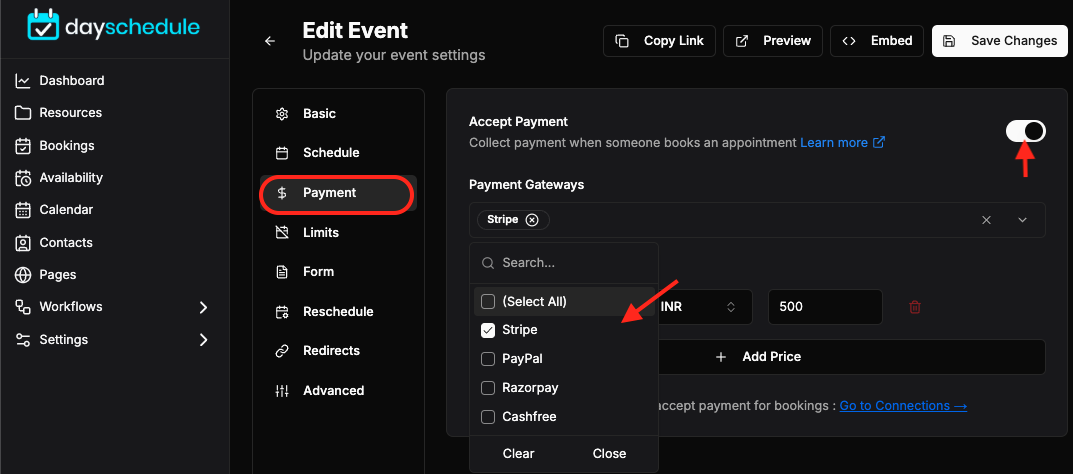
- Add price accordingly and save it
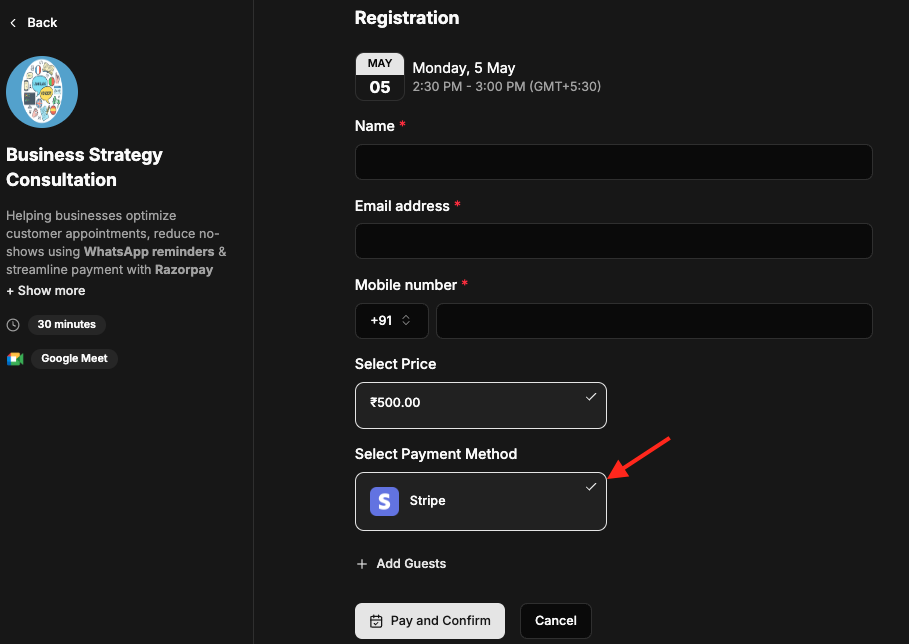
Now the registration form on your appointment page:
Update Stripe Connection
- Go to Connections page
- Select Connection > click on three dots.
- Select the Reconnect this Connection option from menu.
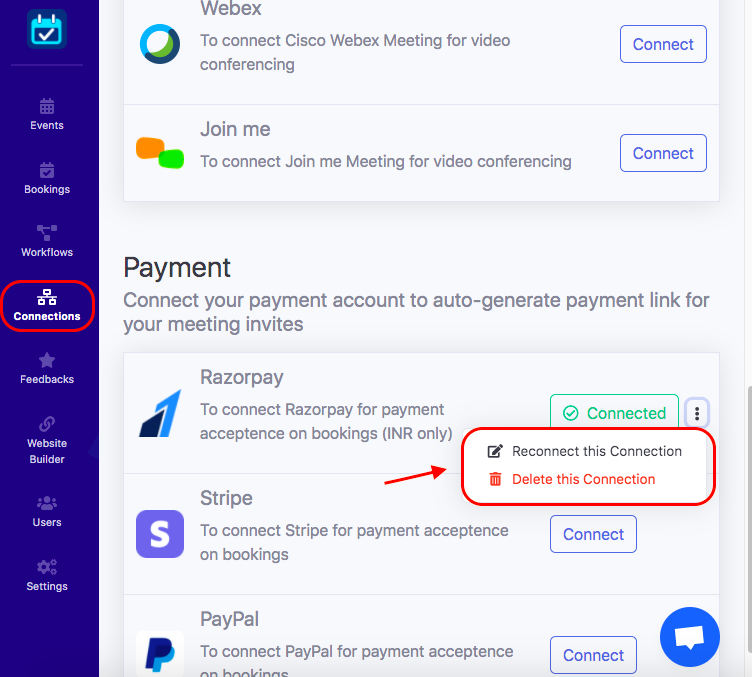
- It will be redirected to the page where you can make any changes.
- Make changes and click on the Save button to update your Stripe connection.
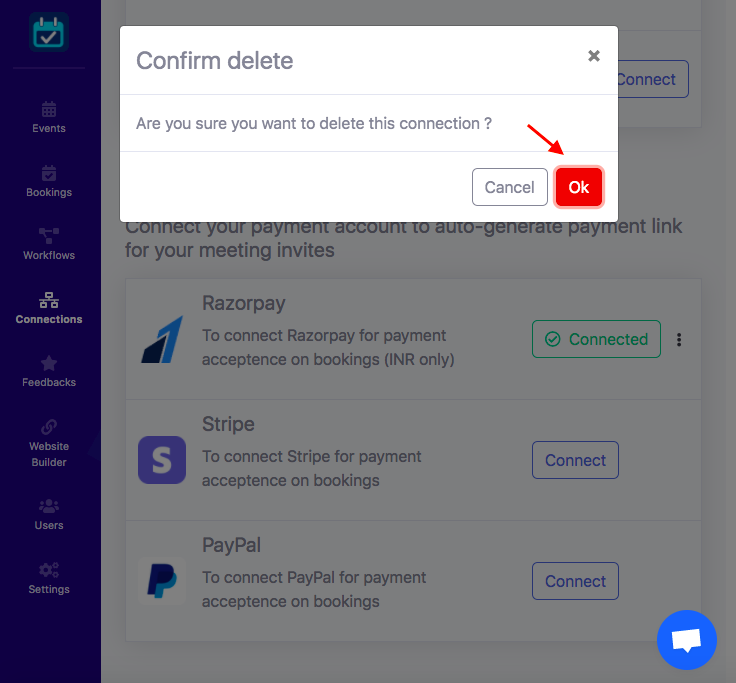
Delete Stripe Connection
- Go to Connections page > Connection > click on three dots .
- Select Delete this Connection option.
- The confirmation box will open, click on Ok to delete this connection
.