Learn how to integrate the DaySchedule appointment booking widget in Next.js website by installing it from NPM or accessing it on GitHub. This widget is designed to showcase available time slots on your website for calendar booking functionality.
Next.js is a free, open-source, React-based full-stack framework developed by Vercel, designed for building high-performance user interfaces and web applications with server side rendering for SEO.
Many popular websites, including Hulu, Twitch, and Ticketmaster are built using Next.js for its server-side rendering and static site generation features.
The Next.js package itself, built on React, continues to grow in popularity for building scalable web applications.
To integrate appointment booking functionality into a Next.js website, you can utilize the DaySchedule widget available on NPM. This widget allows you to add scheduling capabilities, making it easy for users to book appointments directly on your site with minimal setup and configuration.
Installation
Install nextjs, tailwind CSS and dayschedule-widget dependency to setup your project.
npm i dayschedule-widget
Next.js Appointment Booking Button
Create a reusable appointment booking button component in your Next.js project to integrate scheduling functionality across multiple pages or sections.
This modular approach allows you to easily embed the button wherever appointment booking is needed, like on navbar, call to action etc.
'use client';
import 'dayschedule-widget/dist/dayschedule-popup.css';
import 'dayschedule-widget/dist/dayschedule-widget.js';
export const DayScheduleButton = () => {
const handleClick = (event: any) => {
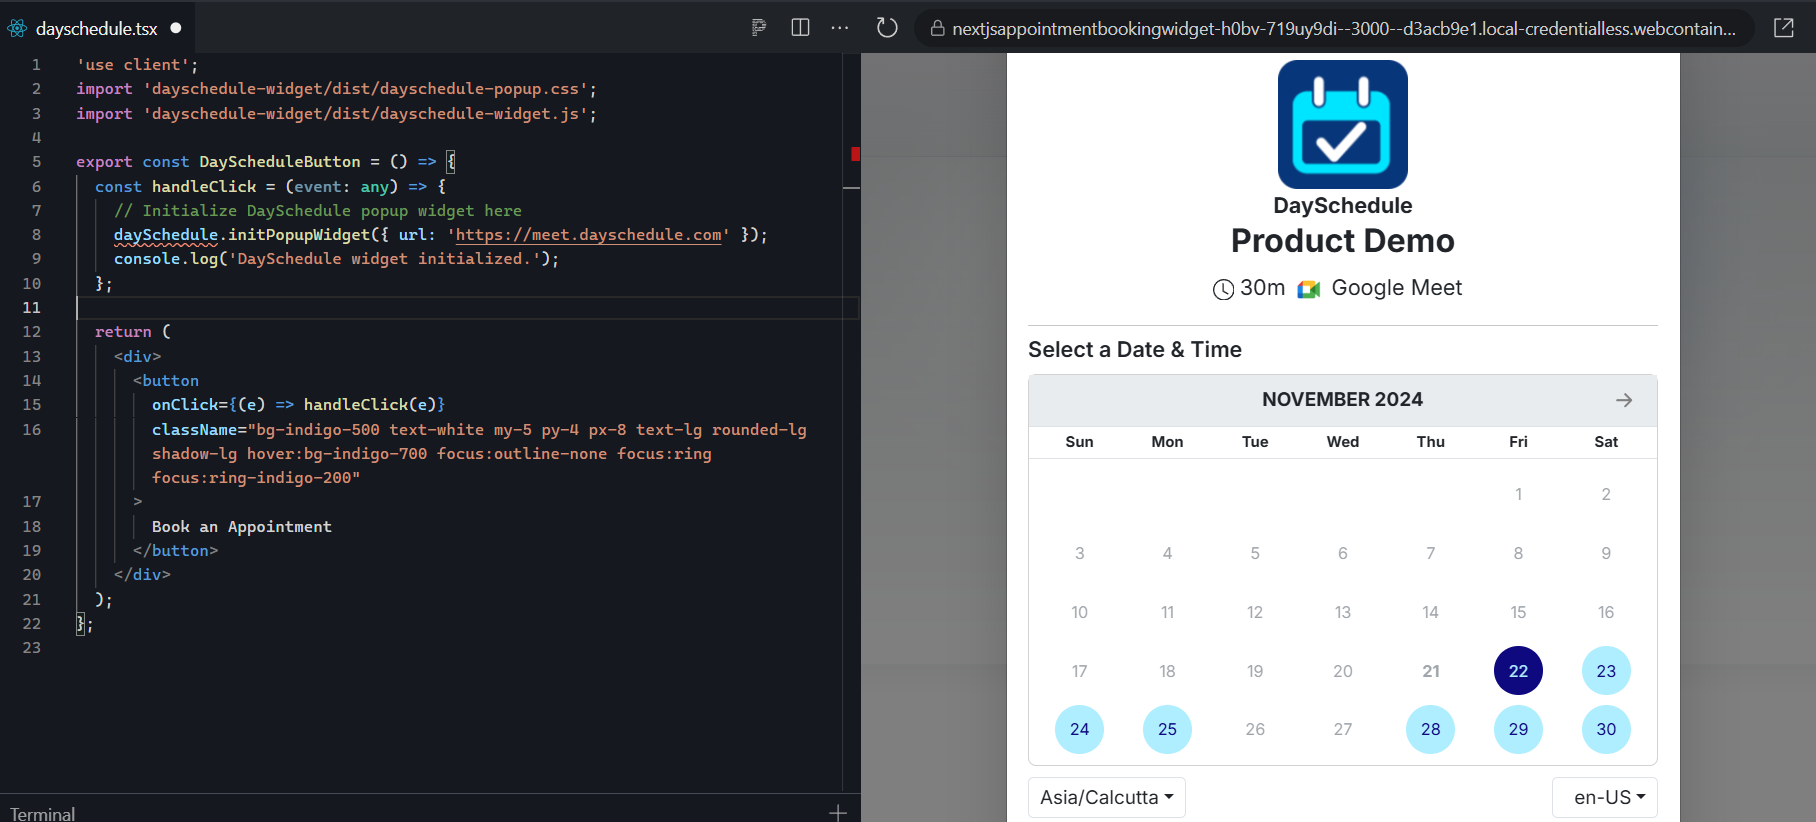
// Initialize DaySchedule popup widget here
daySchedule.initPopupWidget({ url: 'https://meet.dayschedule.com' });
console.log('DaySchedule widget initialized.');
};
return (
<div>
<button
onClick={(e) => handleClick(e)}
className="bg-indigo-500 text-white my-5 py-4 px-8 text-lg rounded-lg shadow-lg hover:bg-indigo-700 focus:outline-none focus:ring focus:ring-indigo-200"
>
Book an Appointment
</button>
</div>
);
};
-
The
DayScheduleButtonis a simple React component made for Next.js and set up to work on the client side. -
It loads the styles and scripts needed for the
dayschedule-widget. -
When you click the button, the
handleClickfunction opens a pop-up to book an appointment using thedaySchedule.initPopupWidgetmethod. -
The button is styled with Tailwind CSS to make it look nice and adapt to different screen sizes.
-
The text on the button says “Book an Appointment,” so users know its purpose.
Booking Popup
- Now, we’ve created a
DayScheduleButtoncomponent in our Next.js application. Follow these steps to use it in your app:
import DayScheduleButton from './DayScheduleButton';
-
Include the
DayScheduleButtoncomponent in your JSX:- Place the
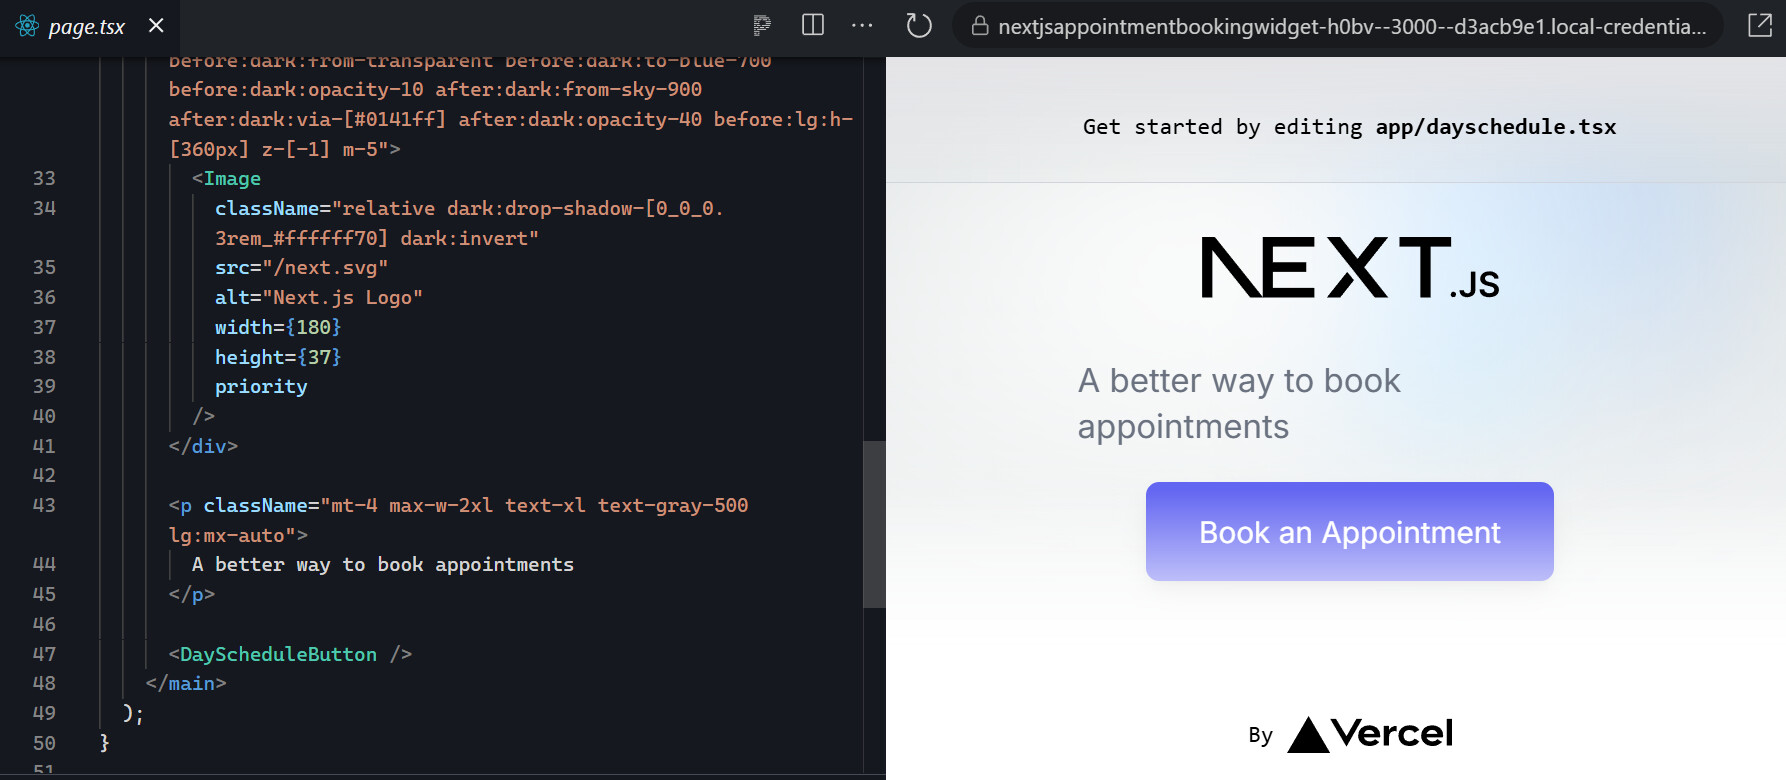
<DayScheduleButton />tag inside the component where you want the book appointment button to appear. For example, in a Next.js page component:
- Place the
export default function Home() {
  return (
    <div>
      {/* Other content */}
      <DayScheduleButton />
      {/* More content */}
    </div>
  );
}
Full code
Check out the complete example code for easy implementation and testing.