If you’re running ads on Facebook, Instagram or Whatsapp and want to track conversions, optimize performance, and retarget users who visit your appointment booking pages, installing the Meta Pixel is a must.
The Meta Pixel (formerly Facebook Pixel) is a piece of tracking code you add to your DaySchedule appointment booking website. It helps you:
- Track actions like visits, bookings, or clicks
- Optimize ad delivery to the right audience
- Create custom audiences for retargeting people who didn’t complete a booking
- Measure conversions and your Facebook, Insta ads performance
For service-based businesses using DaySchedule, adding the Meta Pixel to your booking pages allows you to understand which campaigns lead to more appointments and helps you to increase your bookings.
Create Meta Pixel
- Go to Meta Events Manager
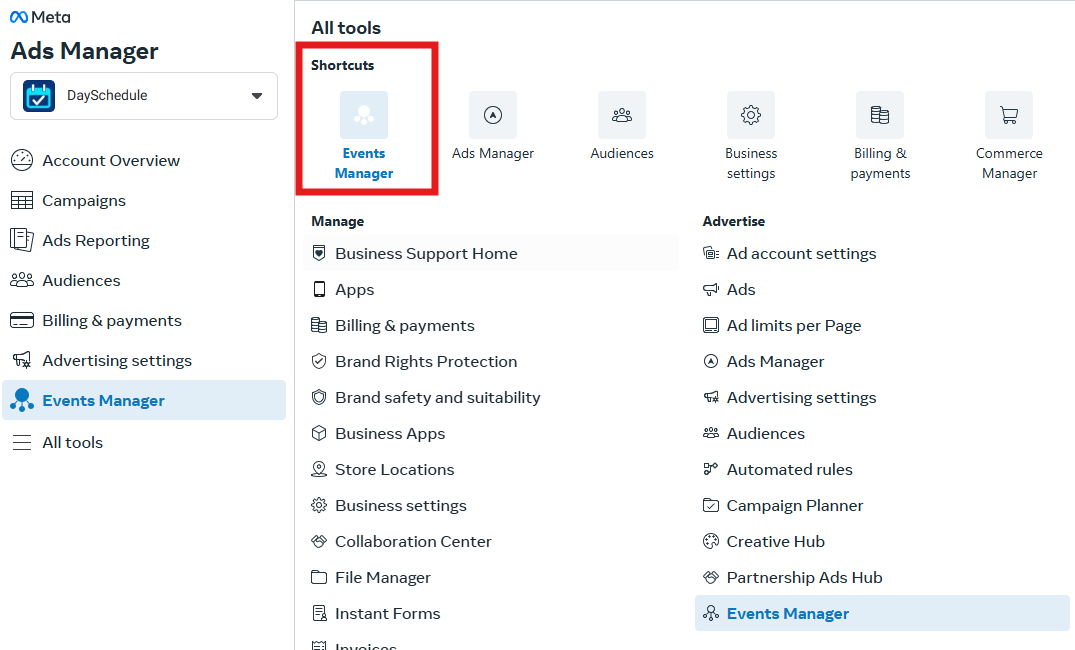
- Click on connect new Data Source and select web to continue
- Create a data source and

- Complete the steps and select “Setup manually” option
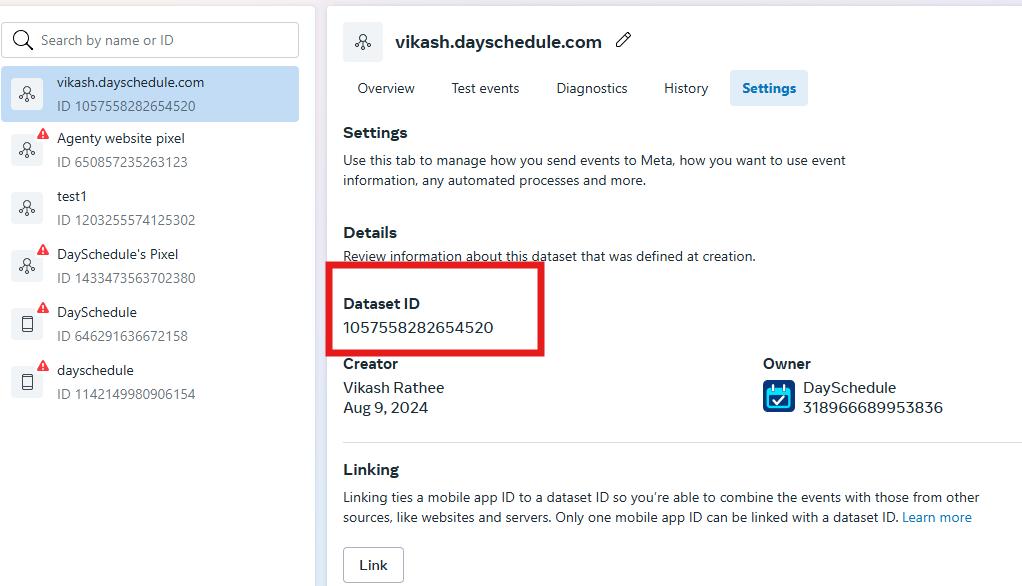
- Once the data source is created, copy the data source id(or pixel id) from the settings or JavaScript code generated by Meta to insert on the website.
Setup Pixel on Appointment Website
- Login to your DaySchedule account
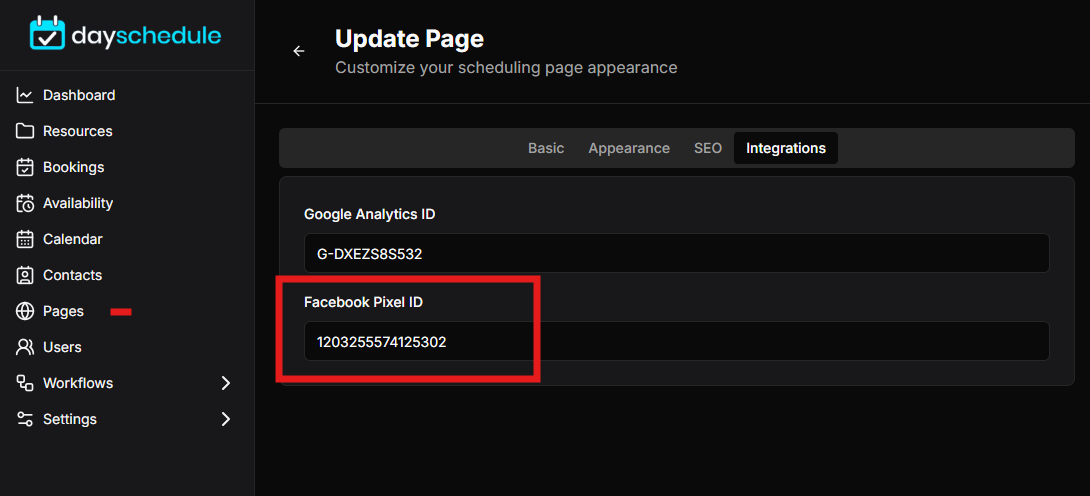
- Go to Pages and edit the page you want to add pixel
- Open the Integrations tab as in the screenshot
- Enter the pixel id and click on save to apply the changes.
It may takes few minutes before the changes are published globally. So, we request to check the pixel events after some time.
Verify Pixel Installation
To confirm the Meta Pixel is installed and sending page view events correctly on your DaySchedule booking page, follow these steps:
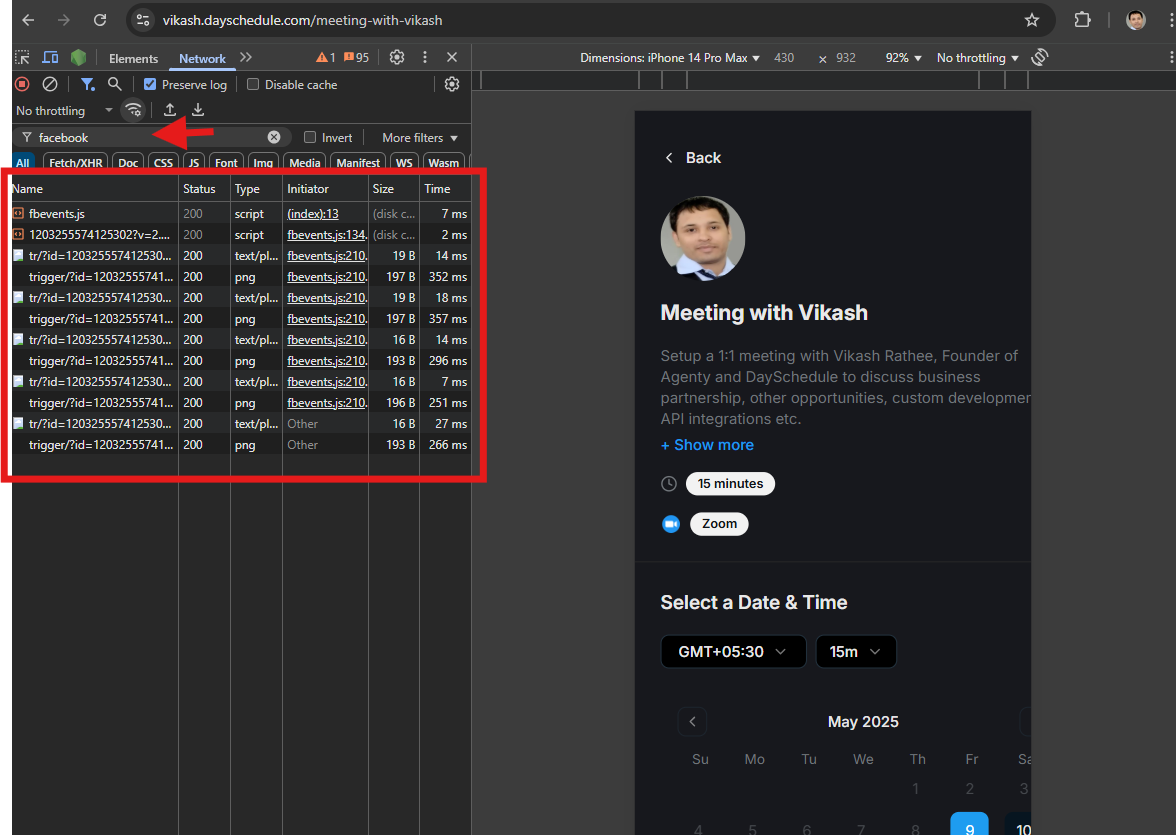
- Open your booking page in Google Chrome
- Right-click anywhere on the page and choose Inspect to open DevTools
- Go to the “Network” tab
- In the filter/search bar, type “facebook”
Test Events in Meta
Meta also provides a Test Events tool that helps you confirm if your pixel is working in real-time, without relying only on browser dev tool.
- Go back to Meta event manager
- Open the “Test Events” tab
- Enter the URL and click on “Test Events” button
- A new tab will open in the browser, which sends the page view events to Meta automatically

You should see PageView events like this:
Custom Events
To track invitee interactions throughout the appointment booking flow, the following event types are used by DaySchedule to track custom conversion. These events are sent to all analytics platforms like Facebook Pixel and Google Analytics to monitor and optimize user engagement, conversions and run ads.
| Event Name | Description |
|---|---|
resource_selected |
Triggered when a user selects a resource, such as a “Meeting with Vikash”. |
date_selected |
Triggered when a user picks a date for the appointment, for example: 2025-06-24. |
time_selected |
Triggered when a user selects a specific time slot such as 9am. |
booking_confirmed |
Triggered when a user successfully books an appointment. |

These events will appear in real time, showing that your pixel is active and properly tracking.