Nuxt.js appointment booking widget to embed on your website from GitHub or install from NPM. The dayschedule appointment picker is designed to display available time-slots on your Nuxt.js website.
Nuxt.js is a free and open-source framework for building user interfaces and full-stack web apps using reusable components. Many popular websites rely on Nuxt.js for its flexibility and performance such as gitlab and Upwork.
The nuxt package sees thousands of downloads every week from NPM, showcasing its popularity among developers.
Now that your Nuxt.js website is up and running, it’s time to enhance it by integrating an appointment scheduling widget to take online appointments easily.
In this article, I will show you how to use our JavaScript widget to embed with Nuxt.js, and bonus point is I will be using tailwind CSS for template styling for a better and responsive booking button.
Setup
Install next.js, tailwind CSS and dayschedule-widget dependency to setup your project.
npm i dayschedule-widget
Nuxt.js Component
<template>
  <div id="app">
    <img
      alt="Vue logo"
      src="https://nuxt.com/assets/design-kit/logo-green-black.svg"
      width="150"
    />
    <h1>Welcome to Nuxt</h1>
    <h2>Click here to see the appointment booking example for DaySchedule</h2>
    <button @click="handleClick" class="custom-button">
      Book an Appointment
    </button>
  </div>
</template>

<script>
export default {
  components: {},
  mounted() {
    import('dayschedule-widget').then((_) => {
      console.log('dayschedule-widget imported dynamically');
    });
  },
  methods: {
    handleClick() {
      daySchedule.initPopupWidget({ url: 'https://meet.dayschedule.com' });
      // Initialize DaySchedule popup widget here
      console.log('DaySchedule Initialized.');
    },
  },
};
</script>

<style scoped>
#app {
  font-family: Avenir, Helvetica, Arial, sans-serif;
  -webkit-font-smoothing: antialiased;
  -moz-osx-font-smoothing: grayscale;
  text-align: center;
  color: #2c3e50;
  margin-top: 60px;
}
.custom-button {
  background-color: #42b883;
  color: #213547;
  padding: 10px 20px;
  font-size: 18px;
  border: none;
  border-radius: 8px;
  cursor: pointer;
  transition: background-color 0.3s ease;
}

.custom-button:hover {
  background-color: #0066cc;
}

.icon {
  margin-right: 10px;
}
.mr-2 {
  margin-right: 2px;
}
</style>
-
The
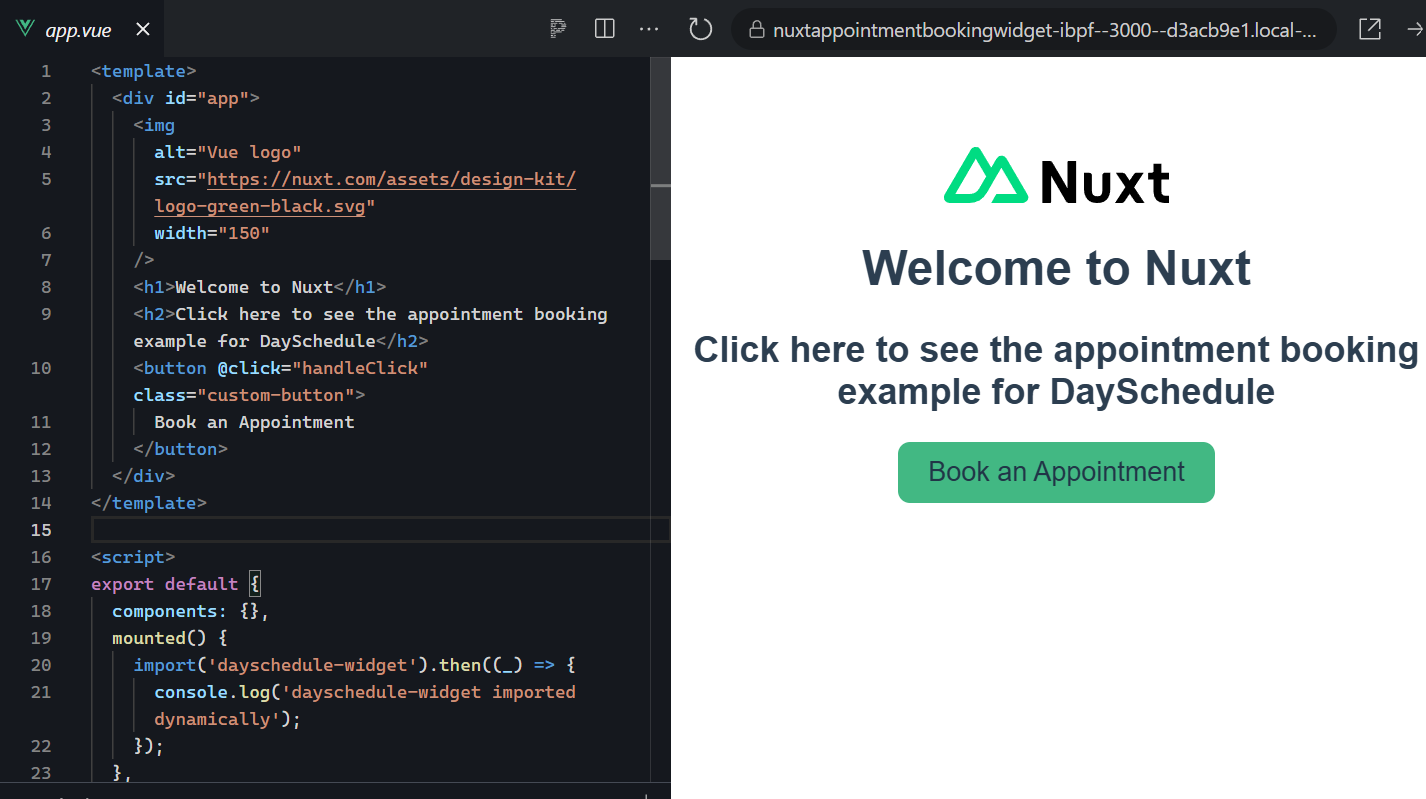
<template>section defines the HTML structure of the component, including a logo, headings, and a button labeled “Book an Appointment.” -
The
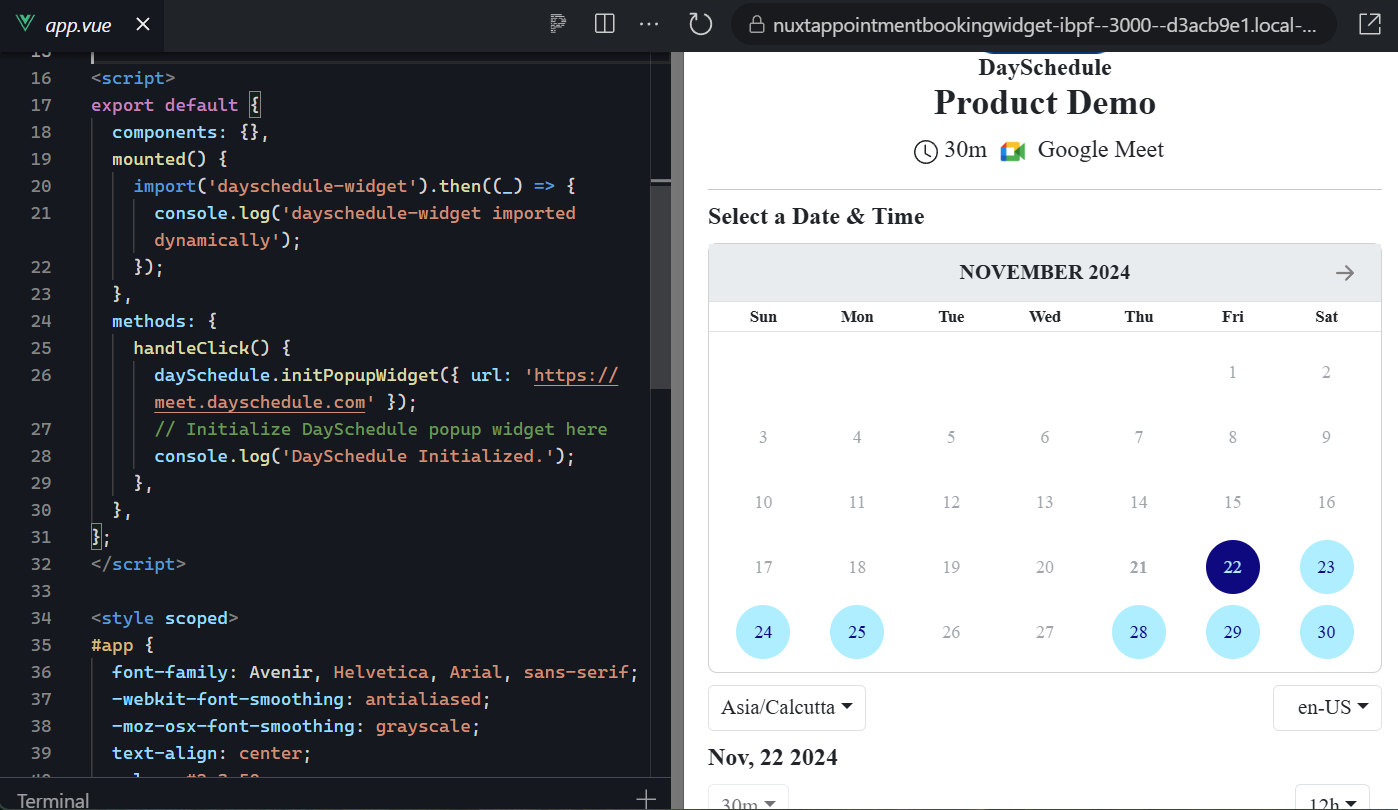
@clickevent on the button triggers thehandleClickmethod to initialize the DaySchedule popup widget. -
The
handleClickmethod usesdaySchedule.initPopupWidgetwith the URLhttps://meet.dayschedule.comto open the scheduling popup. -
The
mountedhook dynamically imports thedayschedule-widgetlibrary to load it only when needed. -
Scoped CSS styles customize the button’s appearance, including hover effects and smooth transitions.
Usage
Here’s how to use the DaySchedule-widget in a Nuxt.js application and follow these steps to use it in your app:
Step 1. Install the nuxt.js.
- Install Nuxt.js by running
npx nuxi@latest init <my-project>to create a new project.
npx nuxi@latest init <my-project>
Step 2: Import the Component
-
In the script section, dynamically import the
dayschedule-widgetlibrary inside themountedlifecycle hook. -
Create a
handleClickmethod to initialize the DaySchedule popup widget usingdaySchedule.initPopupWidgetand the scheduling URLhttps://meet.dayschedule.com
<script>
export default {
  components: {},
  mounted() {
    import('dayschedule-widget').then((_) => {
      console.log('dayschedule-widget imported dynamically');
    });
  },
  methods: {
    handleClick() {
      daySchedule.initPopupWidget({ url: 'https://meet.dayschedule.com' });
      // Initialize DaySchedule popup widget here
      console.log('DaySchedule Initialized.');
    },
  },
};
</script>
Step 3: Use the Component in the Template
- In the template, create a button with a
@clickevent that triggers thehandleClickmethod to open the DaySchedule widget.
<template>
  <div id="app">
    <img
      alt="Vue logo"
      src="https://nuxt.com/assets/design-kit/logo-green-black.svg"
      width="150"
    />
    <h1>Welcome to Nuxt</h1>
    <h2>Click here to see the appointment booking example for DaySchedule</h2>
    <button @click="handleClick" class="custom-button">
      Book an Appointment
    </button>
  </div>
</template>
Full code
Check out the complete example code for easy implementation and testing.