If you are an organization administrator or a scheduling manager, you want to create a calendar schedule for your team. With Teams scheduling feature, we provide a way for all users with Teams to access and manage the team members Calendar.
We often get this question from customers asking how do I make a calendar schedule for my team to manage my team members calendar as well as mine especially in SMBs where scheduling managers are appointed to manage their teacher, coaches, trainer schedules to control the availability in appointment scheduling software.
So, the scheduling manager needs the right tool and access to create, edit and delete multiple calendars scheduled at once for multiple users and groups.
In this article, I will show you how to use day schedule app to easily manage your teams’ calendar in just one place
Create Team member schedule
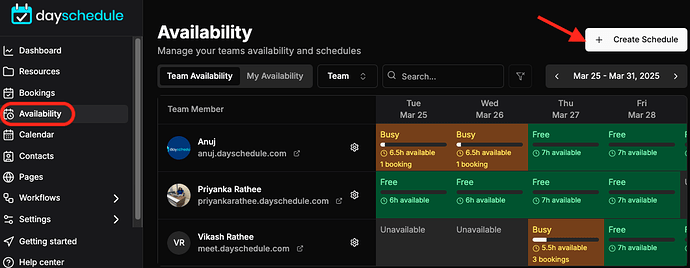
- Go to the Availability page.
- Click on the (+Create Schedule) button and a model will open.
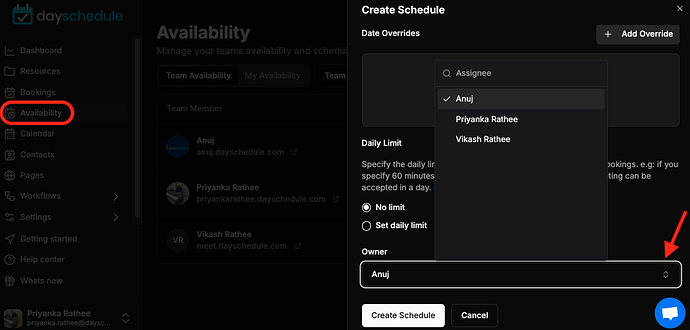
- Select the Team member you want to create a schedule for
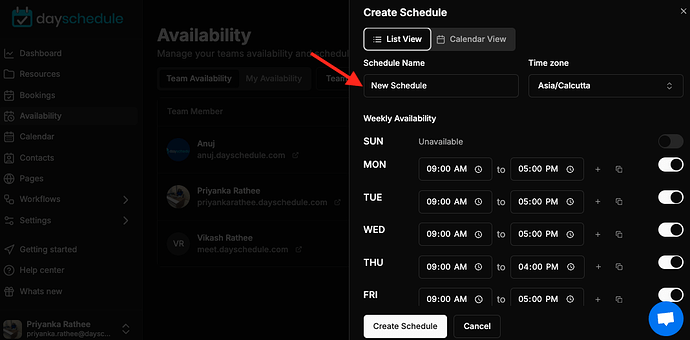
- Now you can create or edit a schedule for selected team members, enter the name and specify time zone.
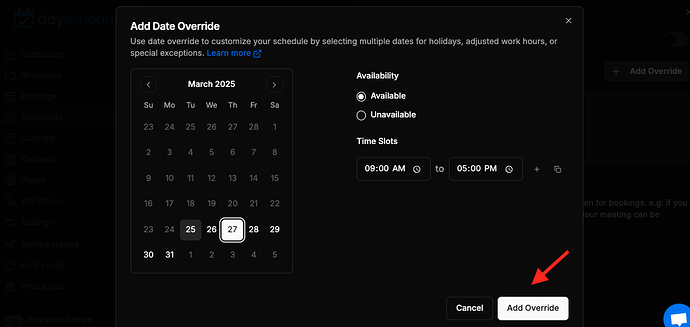
- Once a schedule is created, you may change the working hours, add holidays and exclusions etc. to manage the calendar availability
Manage Team member availability
- Select the Team member and edit the schedule.
- If there are multiple schedule for a team member, you may select the particular schedule from the drop-down
- Change the calendar availability and click on Save button to update the schedule.
Clone a schedule
The clone feature helps to quickly create multiple copies of a calendar schedule instead of adding all the information manually.
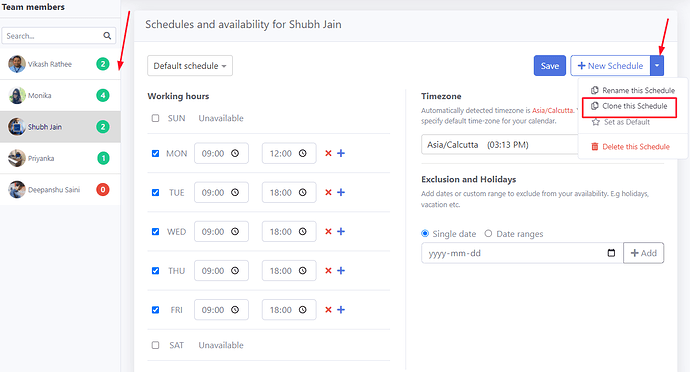
- Select a calendar schedule you want to clone .
- Click on the dropdown beside “New schedule” on the right corner.
- Select the Clone this schedule option and a model will open to confirm details.
- Enter the schedule name, select the team member.
- Click on the Save button to copy it.
Delete Team member schedule
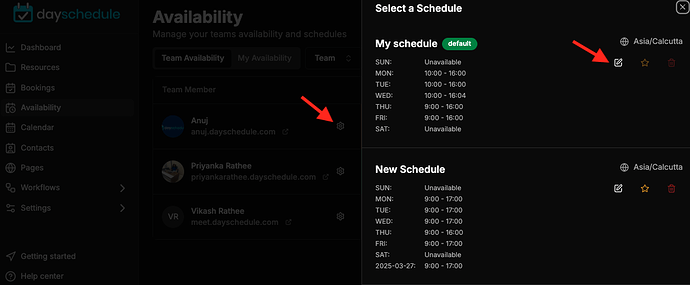
- Select the team member from the “Availability” page whose schedule you want to delete.
- Click on the Edit from right side of particular team member > select schedule
- Click on the Delete button.
- A confirmation dialog will appear before deleting the selected schedule. Click on Confirm to delete permanently.
