Webinar is one of the most effective tools for growing your business and reaching your target audience. It’s a great way to share information, educate people, and build relationships with customers.
The DaySchedule webinar software allows you to create and host webinars online on Zoom, Google meet or Microsoft Teams. In this article I will show you how to host a successful webinar efficiently by sharing the links with attendees to register and join online to automate the recurring webinars.

Create a Webinar
To create a webinar, login to your DaySchedule account.
- Go to the Resources > +Create Resource
- Add Webinar > Enter the webinar details like name, description, image and select your landing page to attach this webinar.
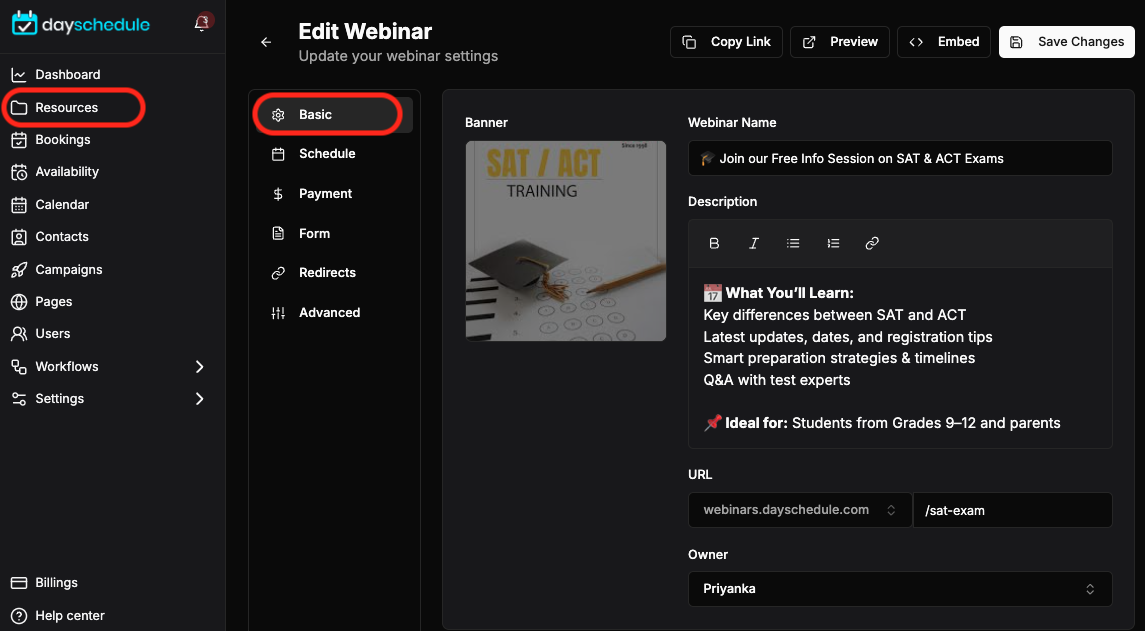
- Select the host for the webinar; it can be you or any of your team members.
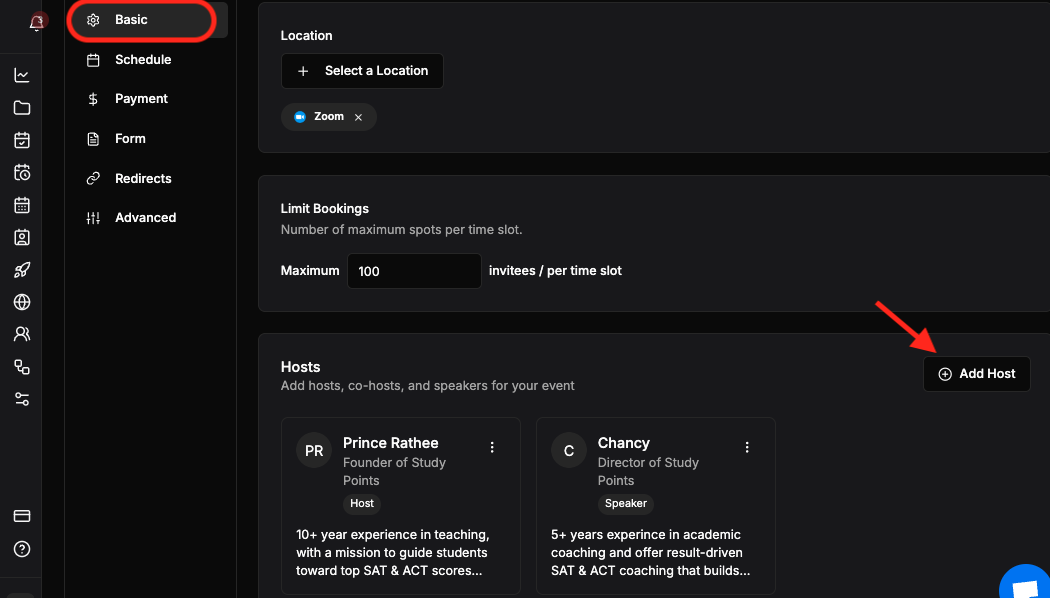
- Webinars can have multiple co-hosts; use the dropdown to select the co-hosts for this Webinar.
- Fill in the other details like the location for the webinar, which can be Google meet, Zoom or any other video conferencing software integration available on DaySchedule.
- Specify the maximum number of spots for the webinar
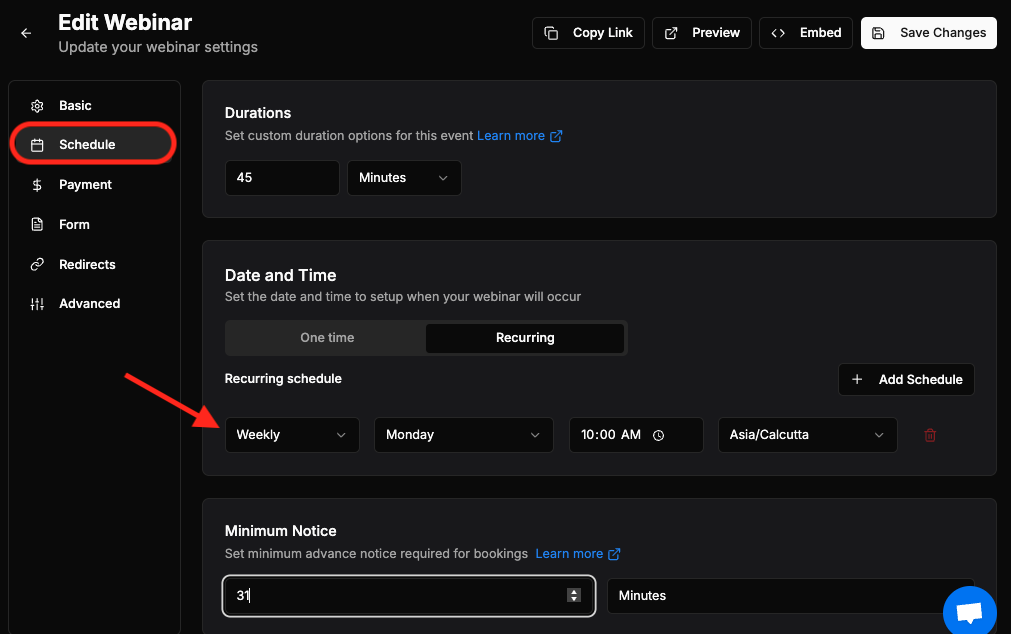
- You can also specify date ranges, duration, recurring schedules and minimum notice before meeting etc…
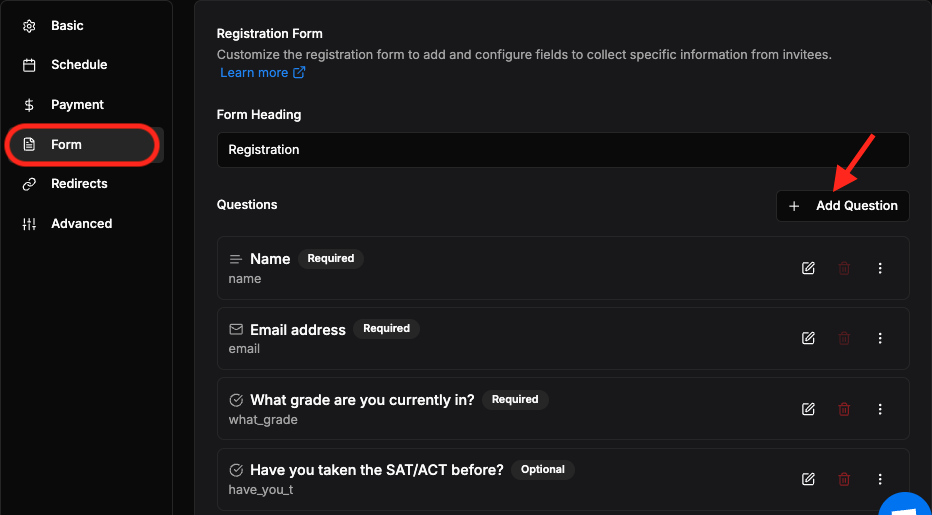
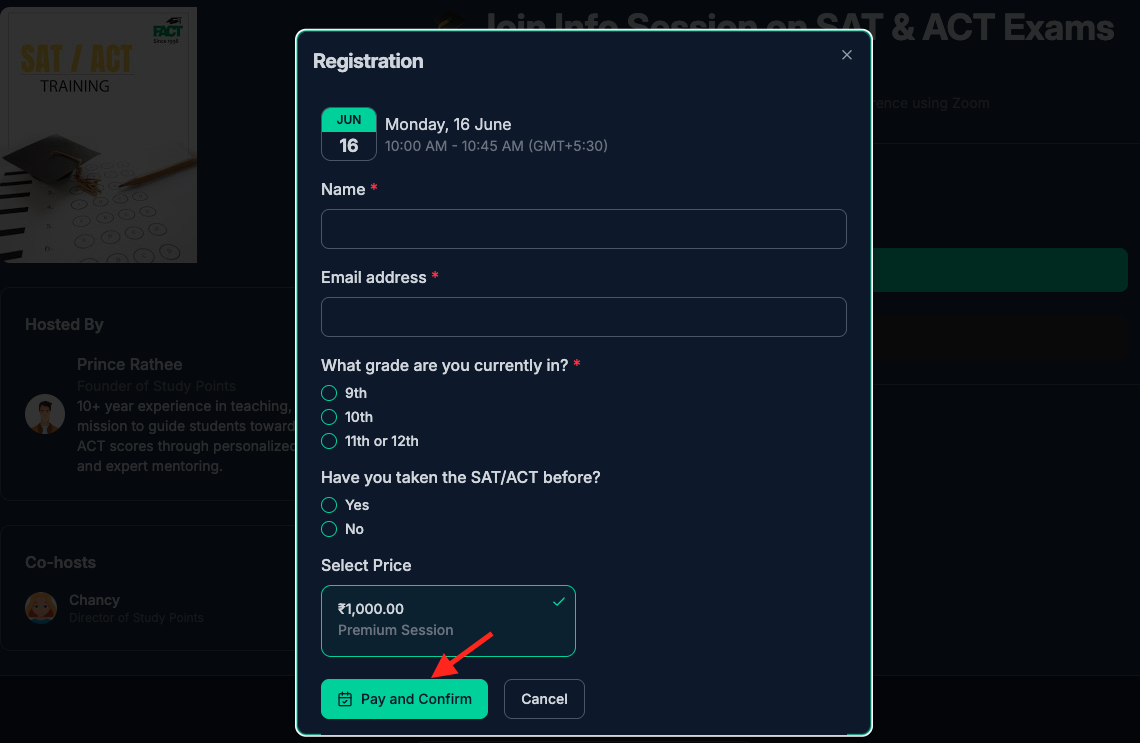
- Build a dynamic registration form for attendees to ask questions. You can add as many questions on the webinar landing page and mark them mandatory by clicking on the checkbox “Is Required”. The attendees need to fill in all the information before registering for a webinar.
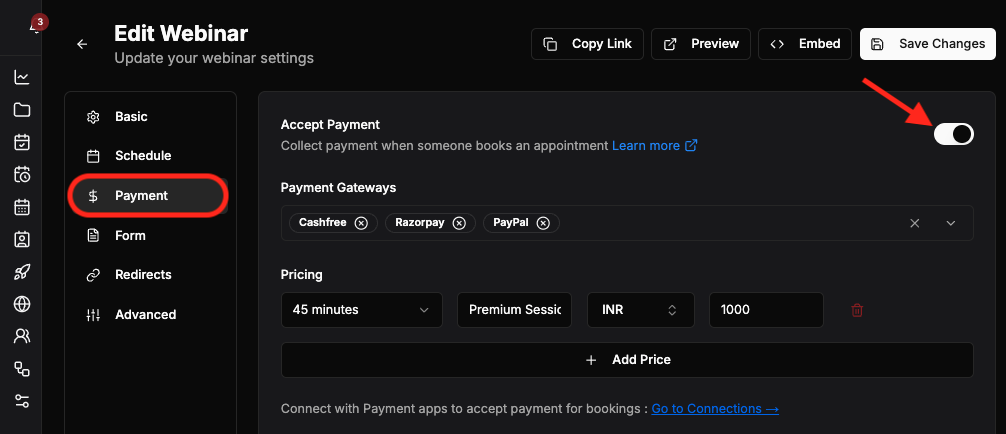
Accept payment and sell tickets
If you are doing a paid webinar, you can also specify price and ticket details to sell your webinar tickets on registration.
The registration will be confirmed only after the payment for paid webinar.
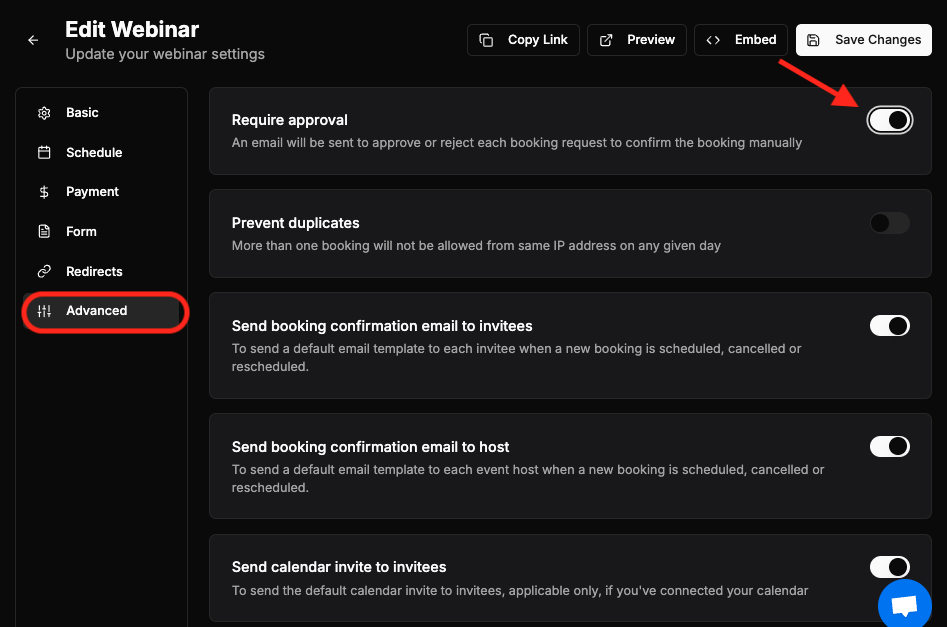
Advance feature
You can use the additional settings to specify regional date and time format on your webinar landing page. For example, you may set a 24h clock if hosting the webinar for European customers instead of am/pm.
Webinar landing page
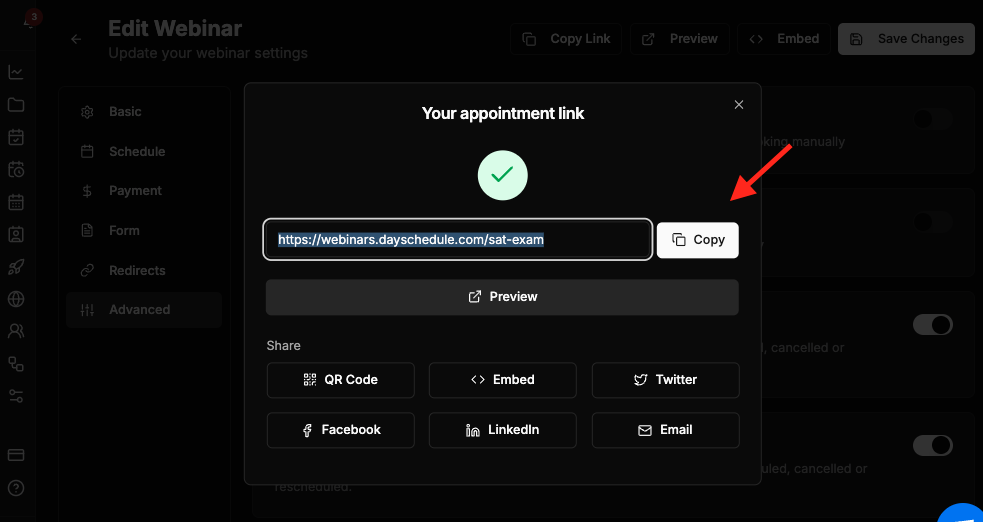
Once you finish the webinar wizard on creating the webinar, you will get your webinar landing page link to share with your customer or embed on the website.
You can share the webinar link on -
- Embed to other websites or web page
- Download the QR Code
- Or copy the URL.
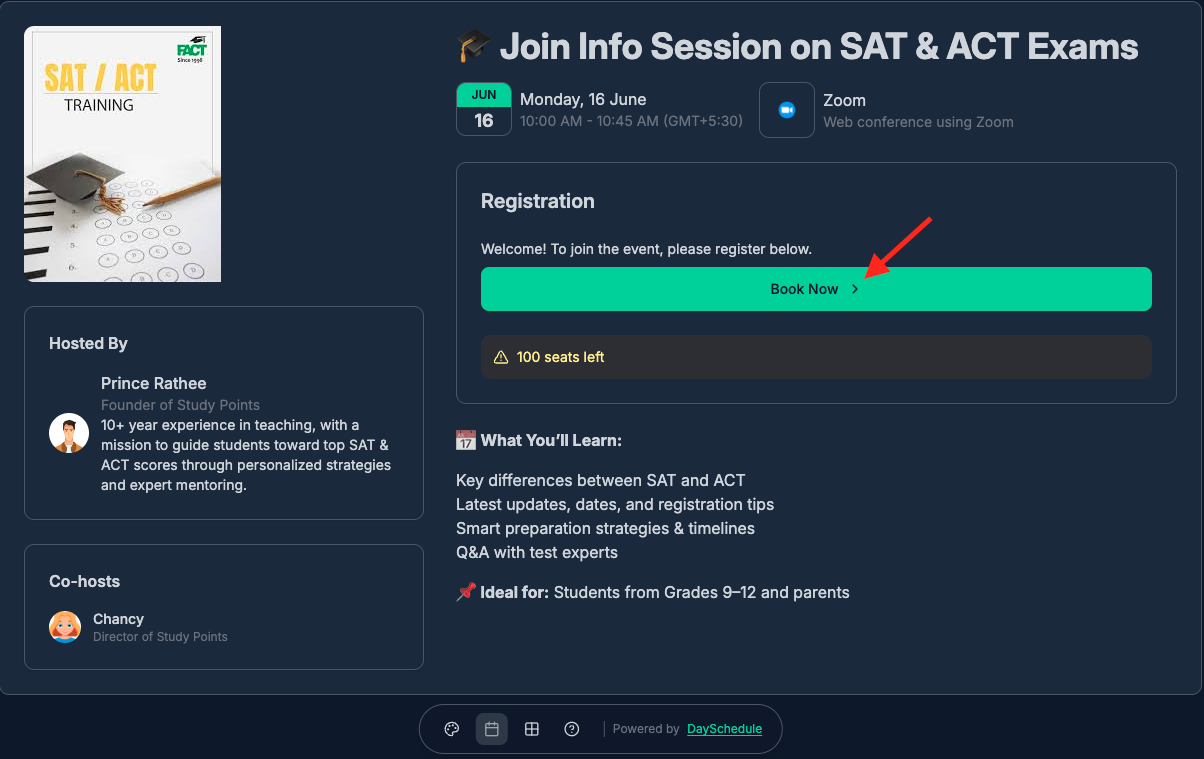
From here your invitee can book the webinar.
Webinar bookings and registration
The participants need to fill out a form by providing details like name, email, and other questions you’ve added while setting up your webinar landing page.
And complete the payment(for paid webinars), to successfully register for the webinar and reserve their seats.
Attendees and bookings details
The booking page allows you to find complete bookings details related to your events and webinars for effective booking management.
On bookings you can manage your webinar attendees reschedule, cancellation, check-in etc.
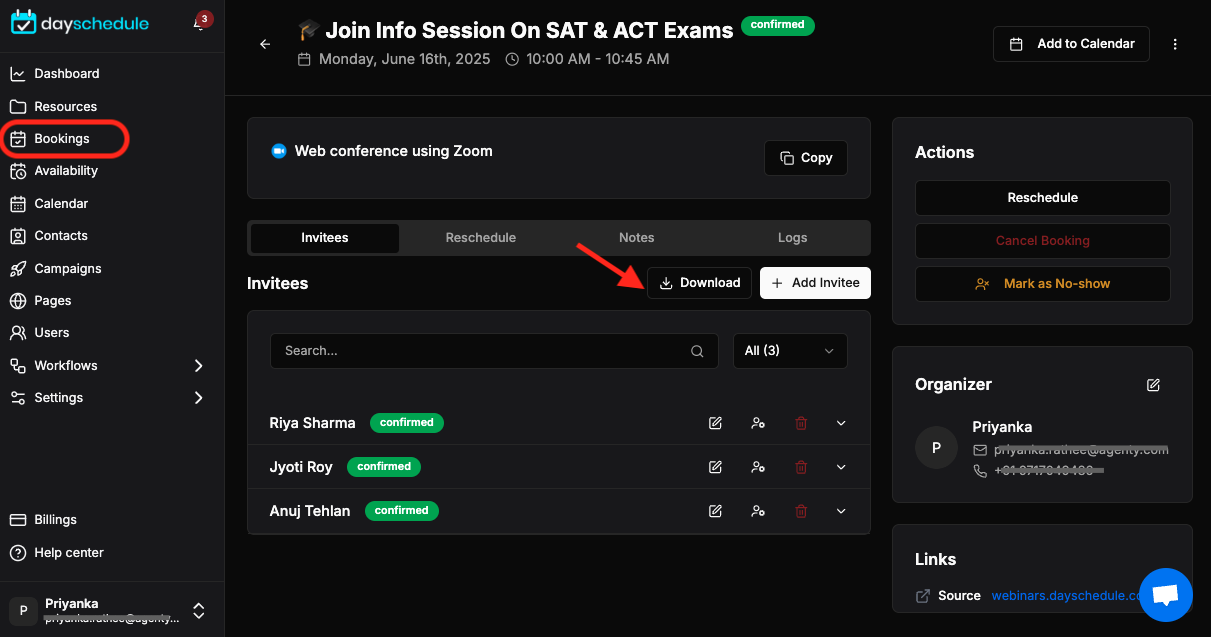
As you can see in the image, all the events and webinars are listed on the left side of the booking page.
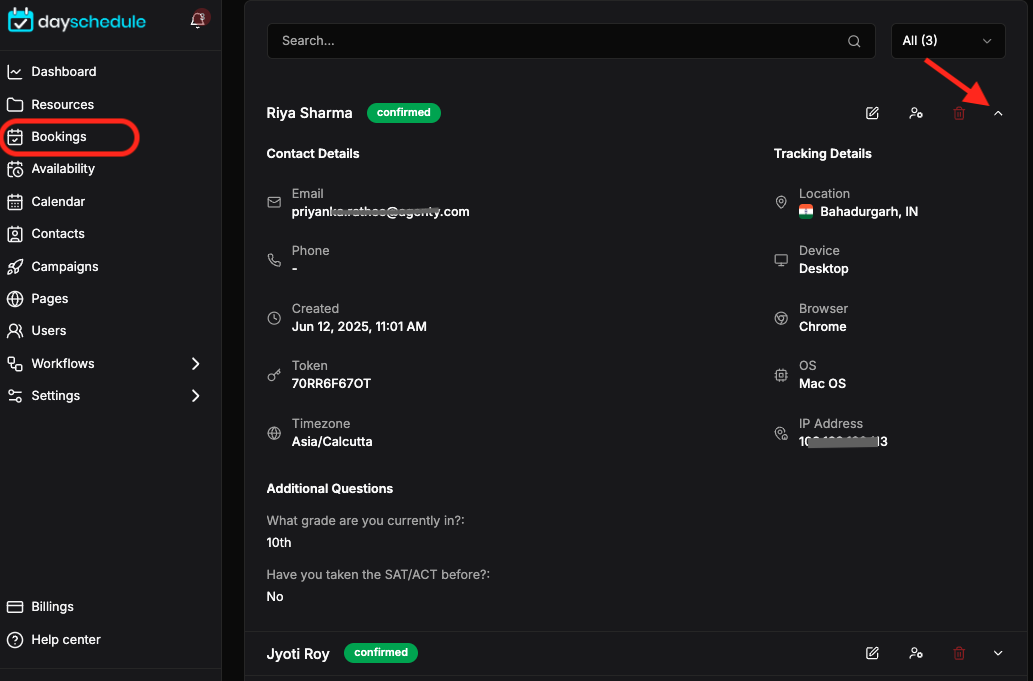
Here you can easily see the attendees registration details by clicking on the drop-down to expand.
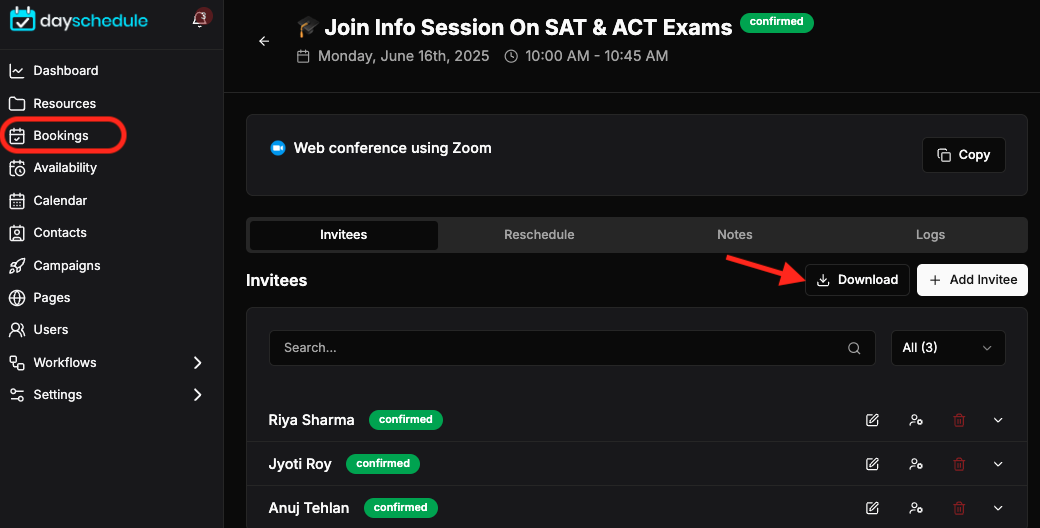
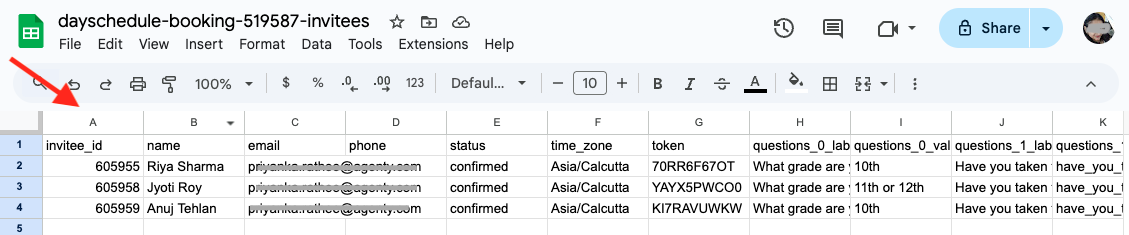
Download registrations
You can easily download all the webinar registration details in CSV format by clicking on the download button.
A CSV file is downloaded with all the fields like name, email, registration date time etc. as shown in the image below
Conduct a webinar
Webinars are the core of business nowadays, especially after the pandemic. Live classes and webinars are a magnificent way to teach, coach, interact with your users, personalize your educational program, familiarize yourself with your audience and many more reasons to consider conducting the webinars.
But how do you conduct a webinar for beginners, that’s both informative and engaging? Here are five tips to help you run a successful webinar:
-
Write an outline or script. You don’t need to write out every word of your presentation, but having some structure will help you organize your thoughts and keep you on track during the live event.
-
Practice! Practice makes perfect, so practice in front of a mirror or ask someone else to listen in while you speak so they can give feedback on what works and what doesn’t work.
-
Set up early so you’re ready to go when the time comes! Make sure all technology such as microphones, projectors and computers are working properly before the start time. Be sure to test everything at least once more just prior to starting the event so that nothing goes wrong during the live presentation itself!
-
Create visuals that support your message and engage attendees throughout the presentation – preferably something that can be used again in future presentations (such as slides). It’s helpful if these visuals are easy