When it comes to scheduling appointments, it’s essential to create a good experience for your customers. One way to do this is by displaying a custom thank you message and redirect them to your website after their appointment is confirmed.
Here are some steps to help you setup custom thank you message, redirect to your website or display a call-to-action button on booking confirmed screen
Thank you message
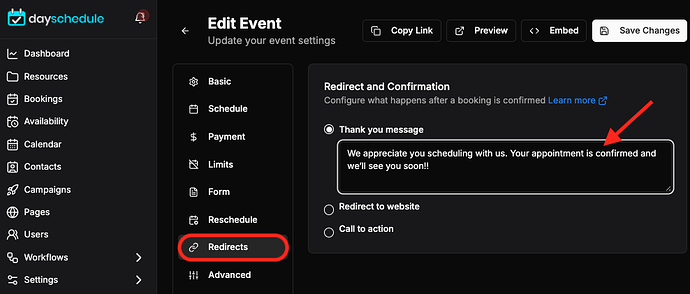
You can add a custom thank you message in resource settings, follow the steps below to setup your custom message:
- Create or edit your event, webinar or service > Redirects
- Add a message by clicking on “Thank you message”
Keep your message short, simple and direct, and make sure it expresses an appreciation for booking. For example -
Thank you for scheduling an appointment with us. We look forward to seeing you soon!
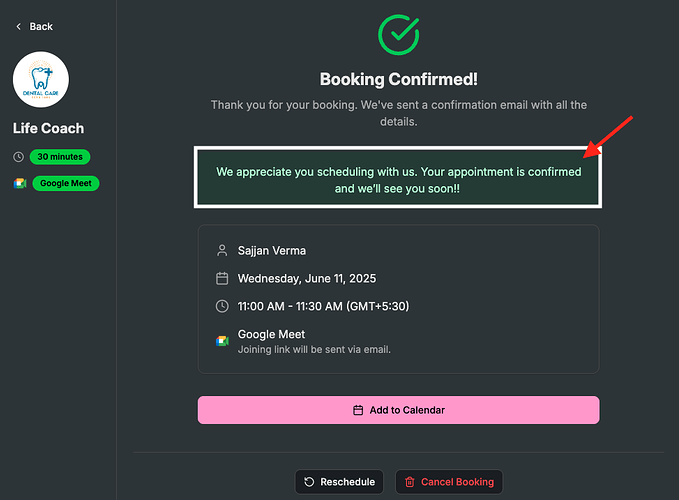
This is how the customer will see it, when an appointment is confirmed -
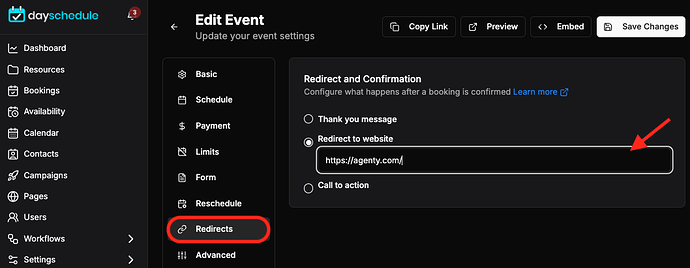
Redirect to website
To set up the redirect to your website option. You need to enter the URL of your website in the redirect page to customize your appointment management page. so that it redirects to a given URL automatically when an appointment is confirmed.
By setting up redirect steps, you can create a positive experience for your customers and direct them to your website, increasing the chances of repeat business or showing your portfolio, testimonials, reviews etc.
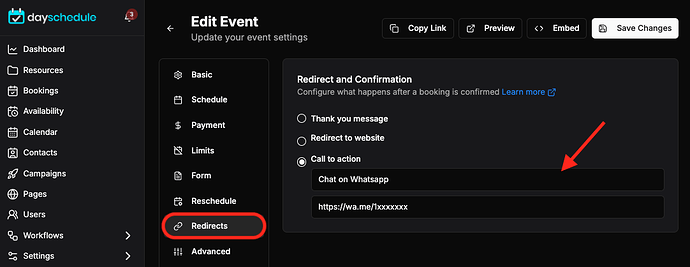
Call to action
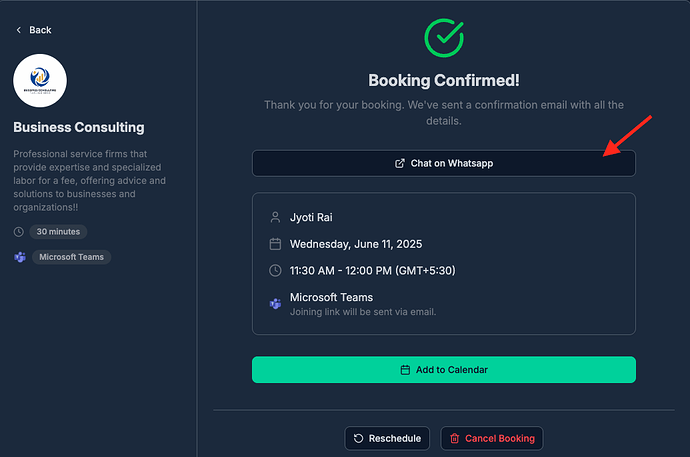
Including a call-to-action (CTA) in your appointment confirmation screen can be an effective way to encourage your customers to take further action, such as leaving a review, scheduling another appointment or contacting you on WhatsApp.
Here is one example, where I have added a Contact on WhatsApp button on my appointment confirmation screen to encourage customers to WhatsApp me if they need any help or questions related to the booking, payment etc.
This is how the CTA button will looks like on appointment confirmation page -
