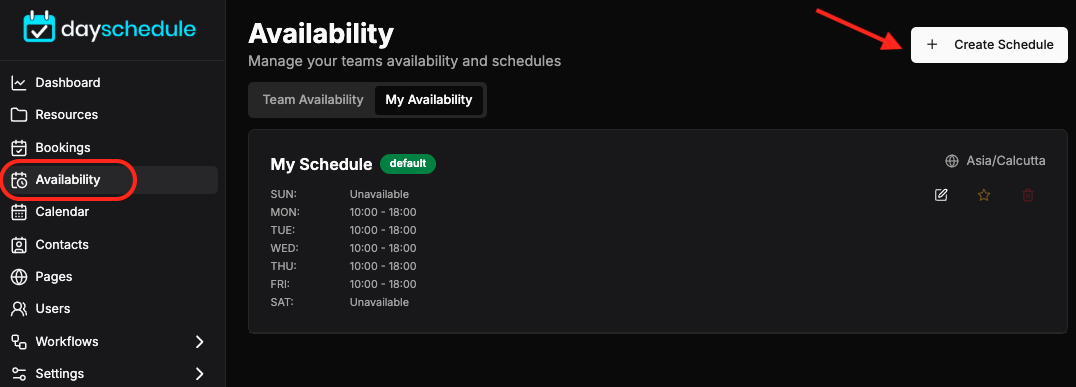
The scheduling and availability feature on DaySchedule appointment scheduler allows you to specify your working hours to enable the calendar for online appointment and meeting scheduling.
Now, with the DaySchedule Appointment Scheduler you can use the scheduling API to -
- Specify daily working hours on a default schedule - you can specify which hours are available for meeting booking and other calendar events to prevent scheduling conflicts.
- You can protect your working hours to avoid bookings during holidays. You can set a date range in exclusion that you would like to go on holidays. For example, from 25th - 1st Jan is excluded from the meeting scheduler
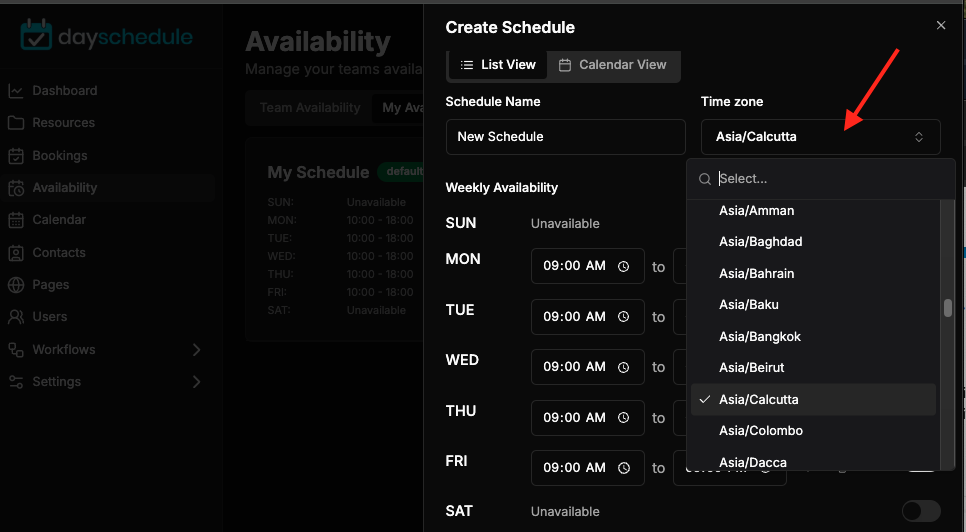
New schedule
You can create any number of schedules and select them in your event to set your calendar availability on appointment booking app automatically based on the times defined on the schedule. Follow these steps to create a new schedule -
- Just go the Availability > Create Schedule
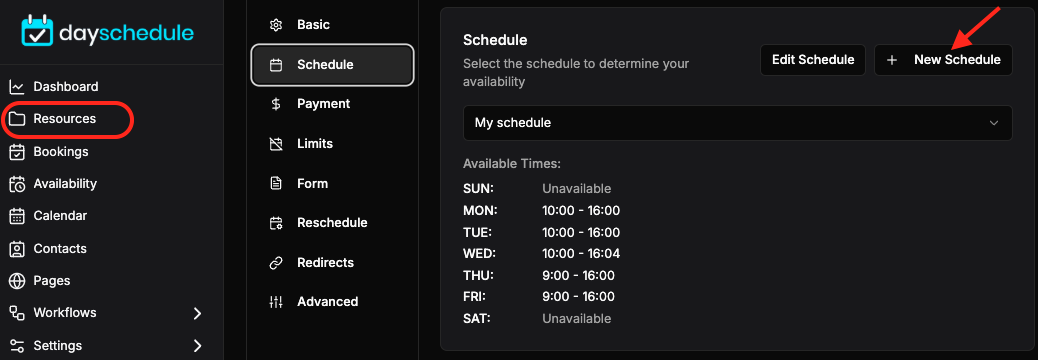
And you can create it on your event page as well, here are few steps:
- Go to your event page> Schedule
- Click on the New schedule button to create a new schedule
- Give a name to your schedule
- Specify working hours, time zone and exclusion dates if any
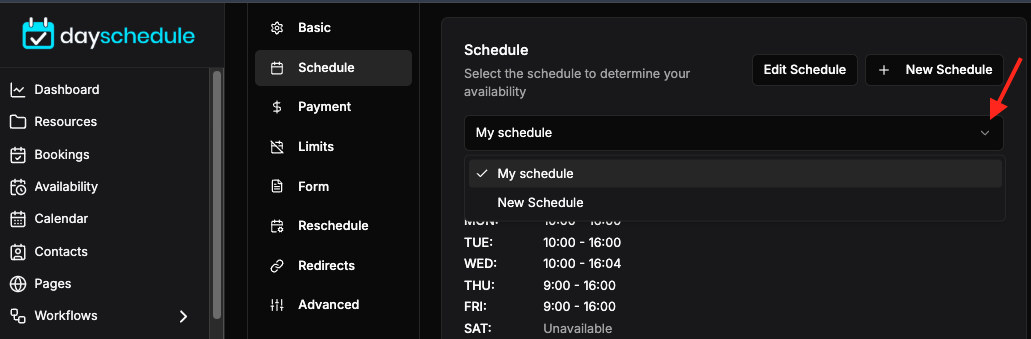
Select as schedule
As you’ve created multiple schedule, now you can select the respective schedule in an event using the radio button.
Time Zones
DaySchedule will automatically detect your browser time zone, or you can change it by selecting the different time zone option from the dropdown to specify in what time zone your meeting will be accepted in the appointment booking system.
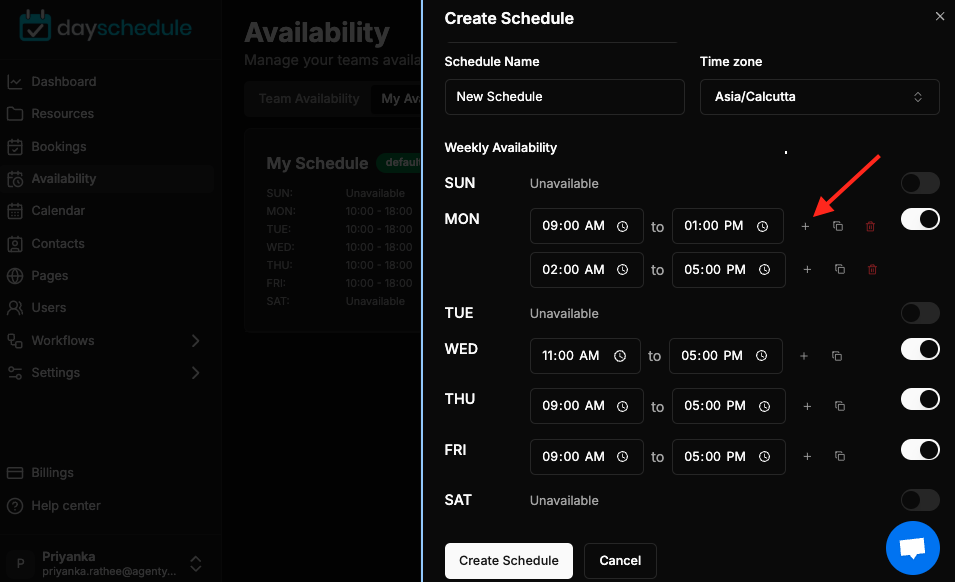
Availability
The Availability option allows you to add your working hours for each day of the week to set real-time calendar availability for your event. You can add different working hours for each day of the week also you can add multiple working hours slots for a day. For example -
Monday -
- 9 am to 1pm
- 2 pm to 5 pm
To set custom availability hours
- Check the check box next to each day
- Select the start and end time for each of your available day
- To add multiple time slots for a day click on the + button and add start and end time for that slot
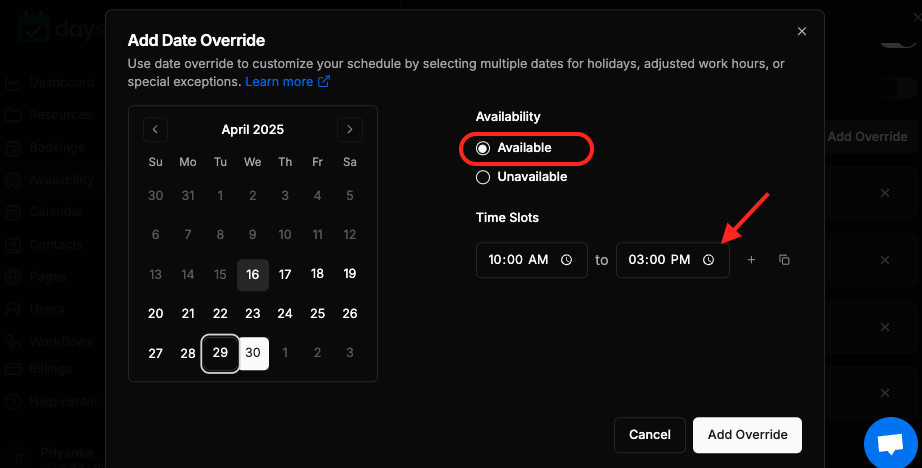
Exclusions
The exclusions option can be used to add holidays, vacation dates or date ranges to exclude from your appointment scheduling calendar, so that no one can book an event for those selected dates to set your unavailability.
Time Override
- Select the single or multiple date
- And then change scheduled time according to your requirements.
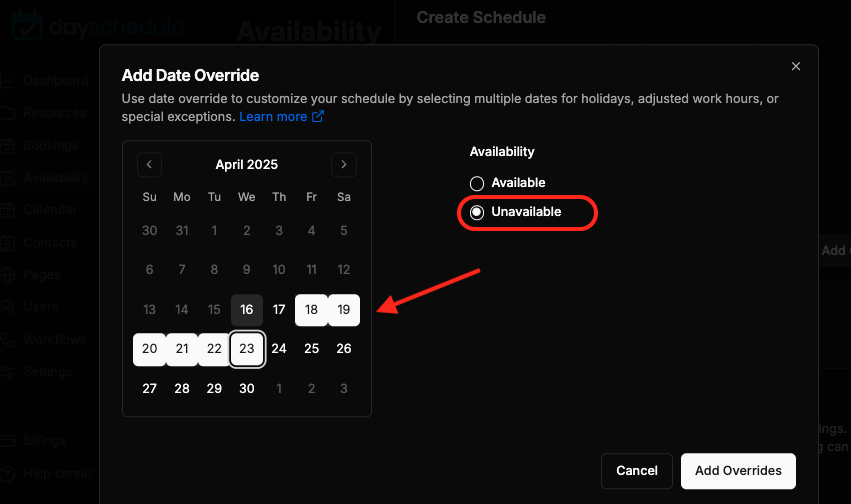
Date Override
- Select the particular dates
- Click on unavailable in Availability.
Now, you can re-use this schedule on multiple events or can create different schedule for each event to specify your availability.